http://teratoday.com/content/tera-guide/tera-instance-guide/tera-sirjuka-gallery-guide
(This is a reupload of my TERA Sirjuka Gallery Guide from 2013 that was hosted on TeraToday before it shut down. It is here solely for posterity and will not be updated. I don't play anymore, sorry!)

Overview
lostguru plays TERA US on the Ascension Valley PvE server. While not as active as before, he still logs on once in a blue moon to help out friends and guildies. If you're also on Ascension Valley and want to get in touch, your best bet is to ask for the "Guardians of Velik" guild or anyone that knows "Margatroid.Alice".
Welcome to the gallery! Sirjuka Gallery is the natural progression from Temple of Temerity in terms of master glyphs. The dungeon offers five unique glyphs for each class that are unobtainable from the Temple of Temerity. Sirjuka Gallery has no immediate cooldown; instead it has a limit of three entries per day, six if you're an elite member, and instance reset scrolls can be used to reset your daily cap if you choose to have a field day with the dungeon.
The overall goal of the dungeon is to protect the crystals on all three platforms; bonus points are awarded for completing objectives in certain ways and within time limits or constraints. The crystals in the center of each platform generate constant aggro on the various mobs and BAMs that spawn, and some of these enemies can be pulled and unaggroed from the crystal while others cannot. More often then not, it's the latter.
For damage classes, it is recommended to get your damage up before going into this dungeon as a party (weapon at least agnitor +9 with rerolled stats). A good estimate might be that you can solo the second boss of Temple of Temerity without any trouble; you probably have enough damage at that point. Then again, you should already be skilled at Temple of Temerity at this point since many of the glyphs there will up your damage output considerably. In other words, it is highly recommended that you don't instance match for Sirjuka Gallery until you've gotten a few of the glyphs you need from Temple of Temerity. It is a faster dungeon to farm, and the badges can be gotten cheaply. This also applies to tanks and healers, as there are many great aggro and support glyphs you can snag from there. There's already a great guide for that dungeon by Espei that you can read here (dead link).
Note that while you're inside doing the dungeon, it is important to wait until your entire party is ready after finishing a platform before heading off to the next, as the platforms seal off behind you as you progress forward, locking anybody who might have been too slow in the previous area. For the same reason, do not resurrect in town if you die, as you will not be able to get back to your party should you return and reenter the dungeon.
Like Temple of Temerity, depending on how well your group did upon dungeon completion you'll have a chance to get two sets of currency items that you can put towards buying your Sirjuka Gallery master glyphs, Silver Talents and Gold Talents (more on that at the end of the guide, no point in worrying about loot if you can't even complete the dungeon).
Table of Contents
Before You Enter
SKILL GLYPHS
DPS - A large majority of the mobs in this dungeon cannot be stunned or slept, and can only be slowed. Since they will be making a beeline for the crystals in the center of each platform, you'll need to delay them for as long as possible so that you have time to kill them. DPS should consider glyphing any skills that slow the opponent down with increased duration, increased slowing effect, and/or decreased cooldown if possible. You'll want constantly use these skills during your standard damage rotation during the first and second platforms. Additionally, if you have any skills that reduce the endurance of targets you hit, glyph them for increased duration and effectiveness if possible, since you'll want to keep them stacked on mobs and BAMs whenever possible to speed killing.
TANK - Glyph for anything and everything that helps with aggro; you're gonna need all the aggro you can get for the second and third platforms. Extra points not spent on your tanking glyphs should go towards damage, since it helps with aggro and you'll want to contribute damage whenever possible. Like DPS, you should also glyph your endurance reduction skills.
HEALER - Your primary job for a large part of this dungeon will not involve healing, since many of the mobs and BAMs you're going to kill will only target the center crystals anyway. Instead, you should glyph your knockdown and CC (crowd control) skills with reduced cooldown and anything else that may help out, as you'll be going after bomb jockeys and keeping teraliths in perma-knockdown. In other words, glyph your sleeps, stuns, slows, and knockdown skills (see below) for decreased cooldowns and increased effect durations. Don't forget that using Noctenium Infusions will increase the duration of CC skills.
↿ Back to top ↾WEAPON AND ARMOR CRYSTALS
In addition to your standard party BAM crystals, everyone will also need a set of normal mob damage crystals, as the entire first platform consists of normal mobs. In other words, everyone in the party, even the tank and healer, should bring a full set of hunters cruxes (and stalwart too if you have those on hand) for the first platform. Tanks should consider bringing more threatening crystals to swap out as well if you're just starting out, as how well you hold aggro on the last two platforms will make or break your party's entire run.
↿ Back to top ↾CONSUMABLES
HP and MP potions/elixirs and draughts/restoratives are pretty standard. For damage dealers, the MP pots are somewhat more important since you absolutely need to keep up your damage to kill mobs and BAMs before they reach the center crystals on each platform. For the same reason, bring those consumable buff scrolls (savagery, carving, swift, etc.; craft them yourself and use whatever benefits your class the most) and nostrums (they reduce attack skill cooldowns, buy 'em from general merchants) to up your damage, they really do make a difference and are very cheap compared to the money you make from other instances and nexus. You should pretty much have these up all the time. Bring your own campfires and charms as well in case somebody else doesn't have them (you'll want Power/Keen, Enduring, and Infused, buy them from specialty stores). If desired, the healer can use Strength charms for increased knockdown chance, but this usually won't be necessary (make sure not to accidentally charm your party with it if you do use these charms, they'll be hella mad). Noctenium Infusions are nice to have, so if you have plenty to use, feel free to have them on.
↿ Back to top ↾CLASS KNOCKDOWN SKILLS (healers in particular, know your knockdown skills for your respective classes)
| Warrior | third hit of Rising Fury |
| Lancer | Wallop |
| Slayer | Knockdown Strike |
| Berzerker | Flatten |
| Priest | Final Reprisal |
| Mystic | Metamorphic Smite |
Sorcerer & archer will ideally be on damage duty rather than Teralith duty, but sorcerers can use Arcane Pulse charged past level 2 / Void Pulse and archers can charge up Penetrating / Radiant Arrow for a chance to knockdown if the situation is dire; if a group has a ranged character on Teralith duty in the first place though, something's wrong.
↿ Back to top ↾Entering the Dungeon
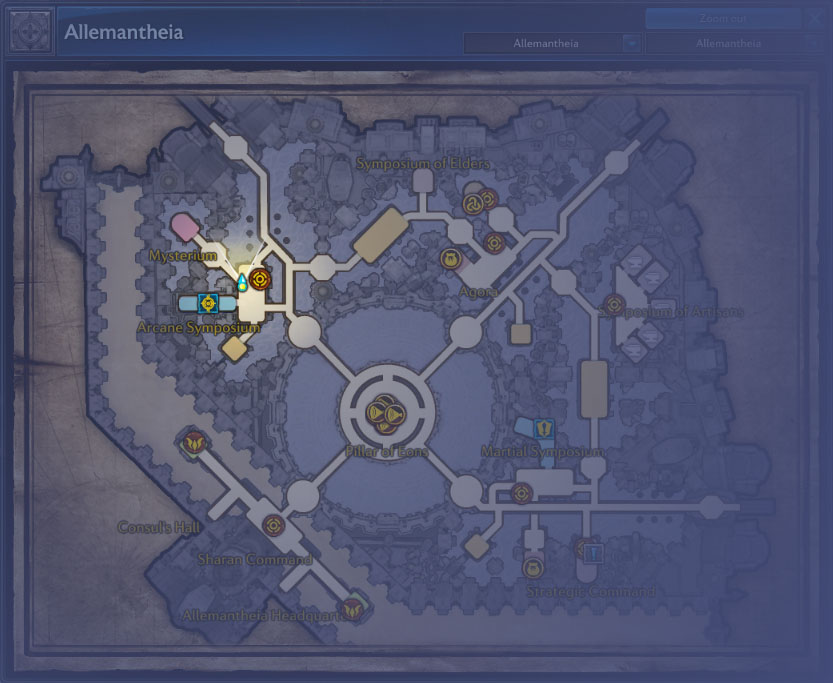
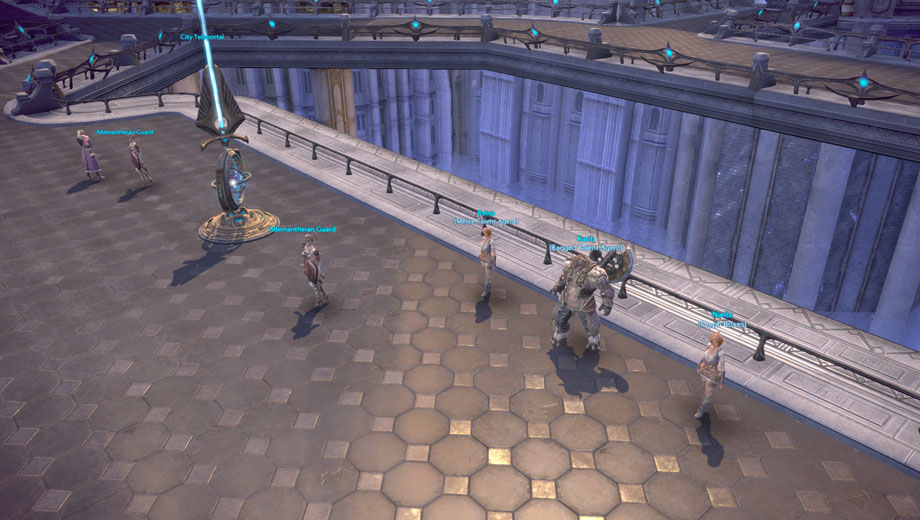
Once you've prepared yourself (and have finished reading this guide of course!), you can enter this dungeon either via instance matching or by forming a party of your own and entering the relevant instance teleporter in Allemantheia (you can use any one of the city teleporter stations to send you to Collegium Arcane and you'll end up right at the entrance). This also happens to be the location of the gallery merchants who you can buy your glyphs from, so feel free to take a peek and drool at your glyphs. To instance match in, you'll need an item level of at least 147, but I recommend one of at least 155, as fresh level 60 gear will not carry you through this dungeon.
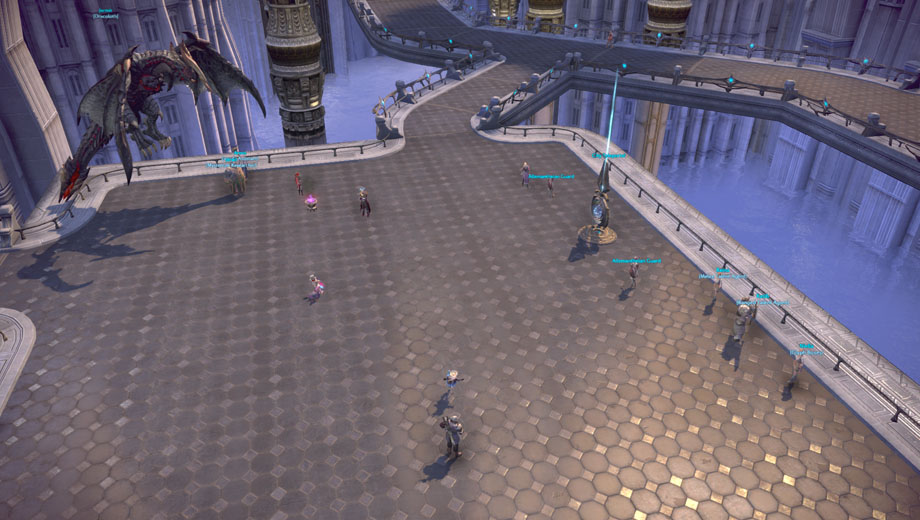
Note: If the dungeon isn't available in instance matching, it means that you haven't completed the questline for it yet. Upon reaching level 60, you should have received a questline which is started by talking to Fraya in Allemantheia Headquarters (A Letter from Fraya). The first quest in the chain (Search for Research) has you enter Malachai's Lab to go open a couple of boxes, while the next (Ominous Traces) has you reenter the same room to kill an imitation BAM. After finishing those two, Sirjuka Gallery will be unlocked and you can complete the final leg of the questline, "A Tour of the Gallery".
Upon entering the dungeon you'll see four platforms ahead of you on your minimap. The first platform closest to you is just for this dungeon's quest line if you need to finish it. All of the action will be taking place on the next three platforms, which we're going to designate as platforms 1, 2, and 3 from now on.
 ↿ Back to top ↾
Point System and Scoring
Sirjuka Gallery differs from Temple of Temerity in that you will gain points for performing certain actions and doing things in certain ways, and lose them if you screw up. Depending on how many points you accumulate by the end of all three platforms in the gallery, you'll be awarded with talents for your glyphs and other goodies. There are overall bonus point opportunities that apply no matter what platform you are on, and bonus point opportunities specific to each platform. I'll sum up the former here, and list the latter in their respective sections throughout this guide. Whenever you gain bonus points for completing one of these requirements, your character will usually say a line of text related to that achievement, so hopefully your screen is constantly filled with speech bubbles.
Overall Bonus Point Opportunities: (applicable on all platforms)
| +1000 | finish anything off using your normal attack (that means the last hit on a mob/BAM must be a normal attack; use your skills until enemies are low health, then use your default autoattack for the last hits; of all the general bonuses available, this is the one you should absolutely try to get each time you kill something no matter what your role is, as there are so many things to kill and these points add up fast) |
| +10 | jump (just jump once everytime you go for this bonus, and only if you have the time to spare; this bonus's cooldown per person is 10 seconds long so stop jumping if you just recently got the bonus, and just wait a while before jumping again) |
| +1000 | sustain Guardian Shout without getting knocked down (LANCER tanks only; you don't have to start the shout during a timer, as long as it expires with a timer up you'll get the points; you'll wanna use this as soon as it's off cooldown generally) |
| +1000 | heal a party member at critical health (HEALER only; critical health is when their health bar starts blinking (your own health doesn't count); the cooldown for this bonus is fairly long, around a minute, so you shouldn't be making an effort to go for this regularly, if at all even) |
| +500 | type /cry after someone dies (aka. doing the mourning emote before they get up from a resurrect; this bonus also seems to have a relatively long cooldown, around a minute or so) |
| +500 | resurrect a dead player (doesn't count if they have a free resurrect and they resurrect themselves on the spot) |
| -1000 | dying (per player, so every time someone dies, another 1000 points are docked) |
As mentioned before, each of the three platforms have additional ways to score bonus points, and will be mentioned in each section below as they come.
↿ Back to top ↾Platform 1
PREPARATION
EVERYONE ON NORMAL MOB DAMAGE AND DAMAGE REDUCTION CRYSTALS (even the tank and healer; damage dealers can go for normal mob backcrit crystals (backbiting and the like) instead if it will help their damage)
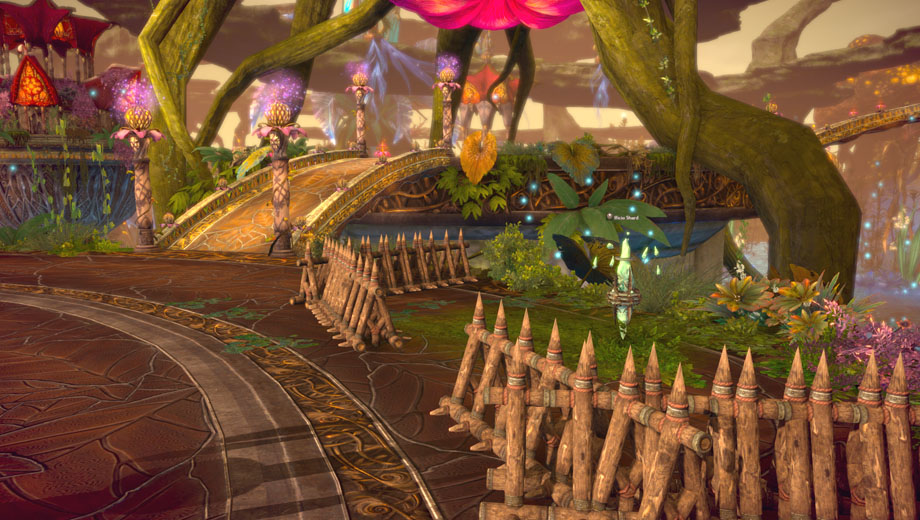
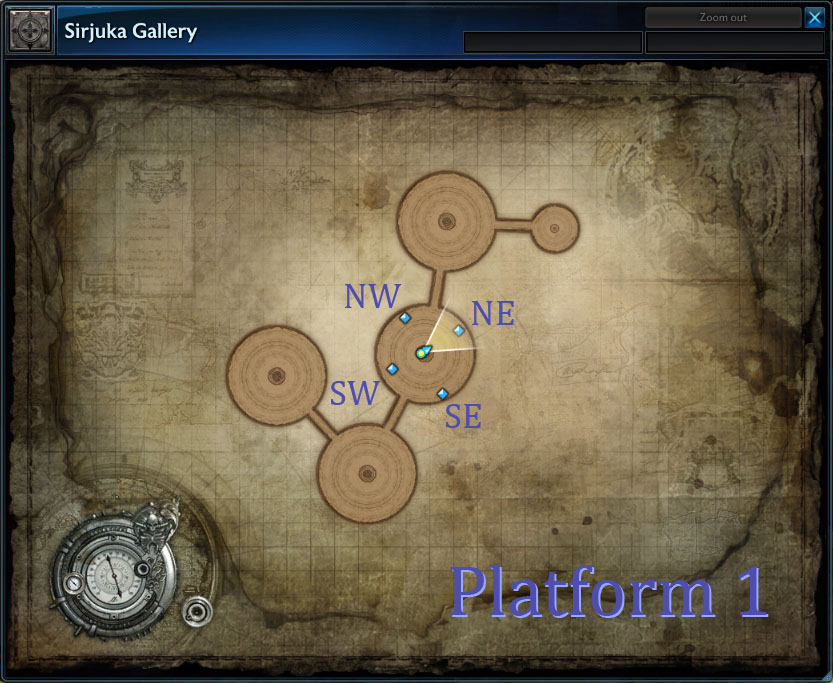
Once you get onto the first platform, you'll see some mobs attacking a center crystal and four smaller green crystals (from now on, shards) on the edges of the platform, one northeast, northwest, southeast, and southwest. These shards are fenced in, and they denote the spawn locations of the mobs that will spawn on this platform. From now on, I'll be referring to these locations with the previously mentioned cardinal directions. Don't worry about the mobs in the center attacking the crystal; they do no damage to the crystal, so there's no rush to kill them.
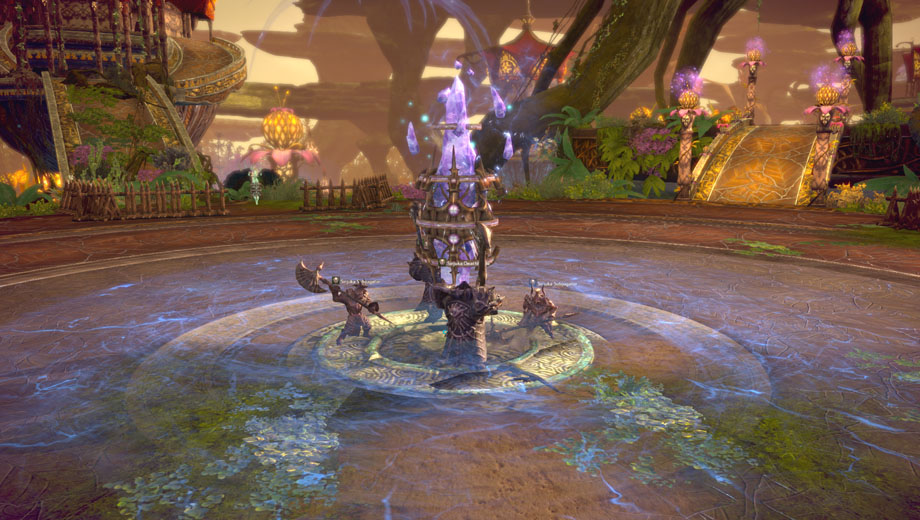
If your tank is a warrior, it's usually not a bad idea for him/her to go assault stance; there isn't much important to hold aggro on, as most of the crucial mobs that need to be killed before they reach center cannot be aggro'd. There's usually no need to swap out glyphs for damage glyphs unless your party damage dealers are really bad at their job.
Since the bonus points for healing a party member at critical health are usually too risky to go for (and since healers have their hands full with jockeys), it is usually standard to just get the bonus at the beginning of the platform and have everyone focus on their roles for the rest of the platform. To get the bonus, have a party member get down to critical health before the platform begins and just heal him/her once the platform starts. There's no point in having more than one player do so due to the cooldown on the bonus. Here are ways to lower health for the immediate saving party member bonus, depending on the members in your party:
- Warriors - spam combative strike (don't worry, you can't die from spamming it, it'll say you don't have enough HP to cast it); begin the casting of smoke aggressor and cancel with death from above or evasive roll
- Berzerkers - unchained anger; overcharge lethal strike and other skills and block cancel
- Archers - overcharge skills
- Other classes - duel each other
DPS and TANK should each go to one of the crystals around the edge of the platform and start whittling their health down (if you have a lancer tank, send him to the northeast crystal so he can grab aggro on the first wave of mobs after the red ones, otherwise send your highest dps; this isn't too important though). DO NOT DESTROY THEM, just bring them down to around 5% or so, use your judgement. As you near 30-50% health you might want to start just using normal attacks since a stray crit can lose you 1000 points. Once your crystal is prepped, tell your party and just wait beside it and begin spamming jump (it's a good idea to keep that bound to a different key than your chained skill key, not just for this dungeon... Manaya's Core hint hint).
HEALER will go to the middle and start whittling the health of the mobs there down. DO NOT KILL THEM YET. Wait until each person at a crystal gives you a ready flag that their crystal is prepped at low health. Once everyone's buffed charmed and ready, finish the mobs off to start the platform.
Lancer tanks can activate Guardian Shout when the party is almost ready.
↿ Back to top ↾
Defense
Thulsa Forever!
Bonus Point Opportunities:
| +1000 | destroy a contaminated crystal (Ificio Shard; the ones on the edge of the platform that you whittled down just now) |
| +100 | kill a mob (aim for normal attack finishes for the 1000 bonus, as it is worth far more) |
| +500 | kill a jockey in a short period of time after you first engage it (don't try going for this unless your healer is off sitting in a corner; as a healer chances are you'll never even see this at all) |
| +5000 | clear the platform without letting the center crystal break |
| +3000 | keep center crystal health above 75% (if no message appears during the platform saying the crystal is starting to crack, you'll get these points upon completion) |
| +25000 | complete the platform with more than five minutes to spare (for every additional second over five minutes, another +50 points are added onto this) |
| -500 | let the center crystal break |
As soon as all the mobs in the middle are killed by the healer, a timer and on-screen message will appear. Bonus point opportunities can be claimed as long as this timer is up.
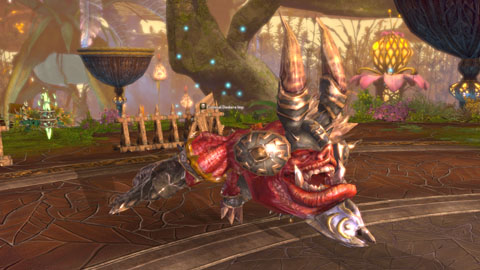
DPS (& TANK) should break their crystals as soon as the timer starts. Immediately, a giant red mob (Colossal Deskera Imp) will spawn at your location and make a beeline for the center crystal. They are unaggroable, so kill them quickly. They get knocked over fairly easily, so be sure you don't knock it too far away from yourself as you try and kill it with a normal attack. As soon as you finish, head to the northeast side of the platform in preparation for the first group of mobs. Funnily enough, the Deskera Imp is the kill required by instance matching, so if you instance matched into the dungeon, you should receive a parcel post with your Valkyon's Response as soon as a party member kills one.
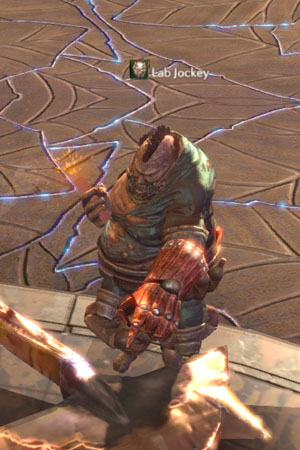
If any party members decided to get themselves to critical before the platform started, the HEALER should heal them as soon as possible then immediately assume jockey duty. The healer's job is to prevent the Lab Jockeys from reaching the crystal and throwing their bombs (they hit HARD). They appear at set intervals randomly at any one of the four spawns, are unaggroable, and make a beeline for the crystal. Use sleeps, slows, and stuns anytime you need to. They're prone to knockdowns as well, so use that fact to your advantage and keep your knockdown skill (refer to the above list) on cooldown. A good tactic is usually to sleep the jockey as soon as you see it, then start off your damage rotation with your knockdown skill (and last hit with a normal attack). If you're having trouble spotting jockeys, use your compass to help out; it's range is enough to cover the entire platform if you stand in the center, so just watch for the orange dots that appear on the edges. Make sure you still pan around the platform manually though, as sometimes you won't see the jockey if it's in the midst of a bunch of other mobs.
Generally the healer will be enough for this job, but if he/she isn't confident or you're doing a learning run, the tank can help. Usually if your party damage is enough, the TANK can prioritize jockeys over other mobs, and should come help kill them as needed with his/her stuns and knockdowns if they get near the crystal. If it helps, tank and healer can divide the platform between them to kill jockeys faster.
The next mobs will spawn northeast where the DPS (& TANK) are waiting. Kill these mobs; the TANK can pull aggro on these when they first spawn to help out the damage dealers; as soon as these are killed (normal attacks please), head back to the middle of the arena to kill the archers that have spawned. If you happen to see a jockey run past you, feel free to kill it as well, but don't make it a priority (they're the healer's job) unless it's too close to the crystal for comfort. As soon as there are only a few archers at low health left to kill, leave one DPS to finish them off and have the rest of the DPS head over to the southwest side of the platform. Generally, whoever has the most slows (such as a sorcerer or archer) should be the first to peel off and greet any new mobs that are spawning in.
At southwest spawn after the archer mobs, DPS (& TANK) will need to kill the Ossugon Tyrant that has just spawned in; he cannot be aggro'd so slow him down as much as you can and kill him before he reaches the center; soon after, a pair of gulon hunters will spawn from the same spot; they also cannot be aggro'd, so kill them as soon as possible with the help of your slows. As these hunters grow close to dead, the DPS should begin peeling off to head to the northeastern side of the platform.
Northeast, four Thulsan elite soldiers will spawn that will absolutely DESTROY your crystal if you let them get to the center (and you as well if you get hit by one of their attacks). Make sure at least one damage dealer is there to greet them, preferably with slows. Unleash hell on these guys and use whatever you can to slow them down (stuns are useless, but endurance debuffs work wonders). The TANK can pull aggro on these guys to help divert their attention for a few seconds, but remember they hit like a bus (definitely go stalwart cruxes if you decide to do this). If you feel like you won't make it before these guys reach the crystal, don't push yourself to normal attack the last hit on these guys, as the amount of damage they can deal to your crystal is not worth the risk (one hit pretty much negates your 75% health bonus opportunity).
After those are dead, DPS (& TANK) should head back to the northeast side to greet the gallery ghilliedhus that are beginning to spawn in ( unaggroable). These will spawn clockwise around the platform, one at each spawn, so as one ghilliedhu is near dead, DPS should start to peel off and head to the next spawn point clockwise; do this until all four ghilliedhus are dead. Having everyone start at the northeastern ghilliedhu speeds killing, so do that. While you usually won't have trouble with these mobs, they do happen to do a huge amount of damage with their attacks as well, so don't let them get to the crystal either.
At the ghilliedhus are dead, THE WHOLE PARTY should be jumping for the bonus points and on jockey duty. DO NOT STOP UNTIL THE CENTER CRYSTAL DISAPPEARS, as jockeys will continue to spawn in until the platform is officially over. Once the crystal disappears, you're safe to prep for the next platform.
↿ Back to top ↾Platform 2
PREPARATION
DPS ON BAM DAMAGE CRYSTALS
TANK ON AGGRO CRYSTALS (whatever helps for aggro generation)
HEALER ON WHATEVER CRYSTALS YOU USE WHEN HEALING
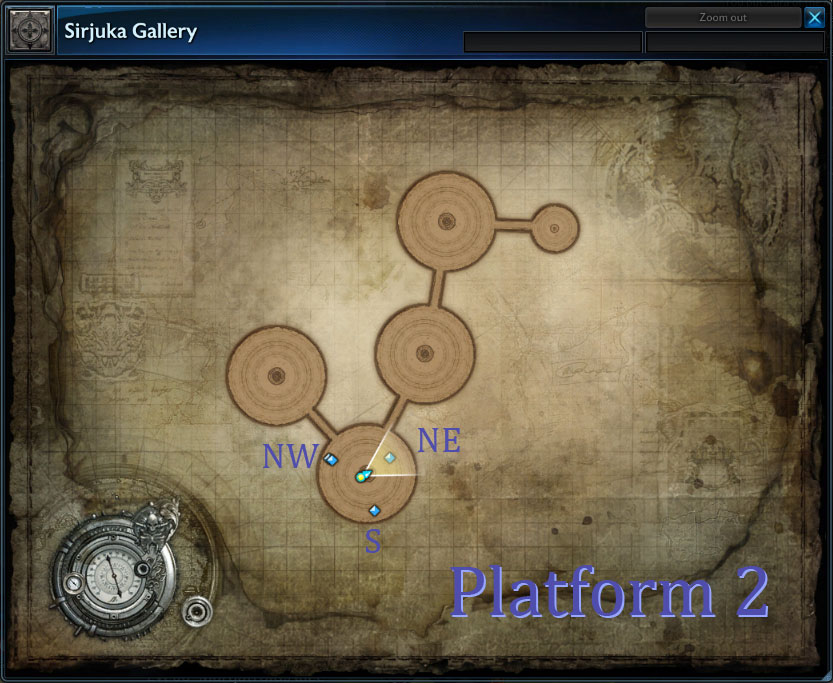
Like the first platform, there will be shards along the perimeter of the platform, except this time, there are only three. They're northeast, northwest, and south. The mobs in the center are identical to the ones from the first platform, so rest easy. Only really difference in layout is that there are barrels along the northern, southwestern, and southeastern sides of the platform. THESE BARRELS WILL ONE-SHOT YOU, so don't touch them if at all possible. Leave them to the tank.
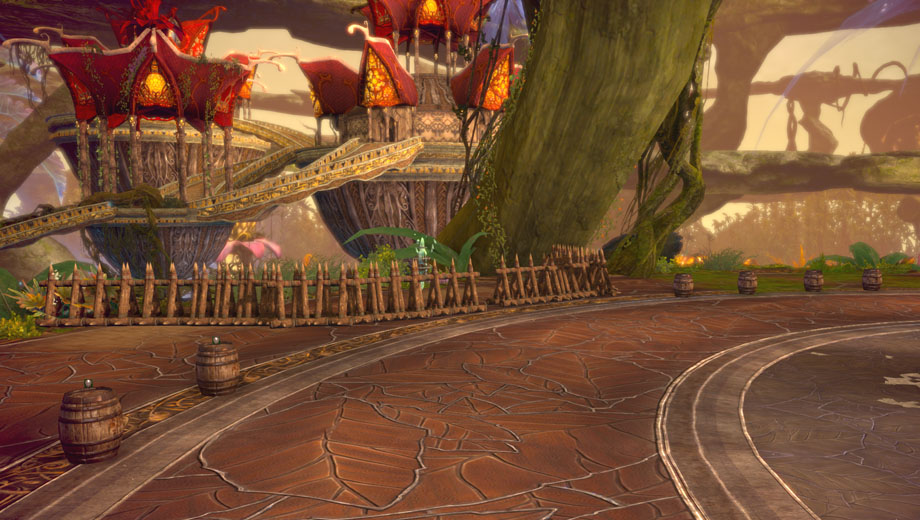
TANKS should note that it is important to keep aggro on all of their assigned BAMs for this platform; once these BAMS reach the crystal, it will be close to impossible to pull them off without the center crystal taking damage. Be careful not to venture too far away from the BAMs you need to kite, or else you'll lose aggro rather quickly to the center crystal.
Warrior tanks should switch back to defensive stance and tanking glyphs now if they haven't already.
There will be three teraliths on this platform that you will not want to kill, but instead, keep knocked-down for the bonus points they give. Teralith 1 will spawn in from the northeastern spawn, teralith 2 from the northwest, and teralith 3 from the south. Designate one DPS (probably the melee class with the least amount of overall dps) to knockdown teralith 1 (I'll refer to the designated person as DPST from now on); the HEALER will be assigned to teraliths 2 & 3 (if healer will have trouble, have the tank assigned to 3); more on that below. Double check that you know your knockdown skills. It should be noted that teraliths gain knockdown resistance every time they get knocked down, so you don't have all the time in the world to kill the other BAMs.
Feel free to have a party member go critical for the healing bonus again, as long as it's not the tank this time.
DPS & TANK should each go to a crystal and start whittling their health down; make sure TANK takes the northeastern crystal alone or is waiting near it alone before the platform is started, as the first BAM he/she needs to kite spawns there. Since there are only three shards on this platform, one damage dealer will often be left behind. Preferably, this dps will be the one getting his/her health down to critical; if this is the case, have him/her wait by the healer in the middle for a quick heal right after the platform starts. Otherwise, wait northwest.
HEALER will go to the middle and start whittling the health of the mobs there down; wait until each person at a crystal gives you a ready flag that their crystal is prepped at low health. Once everyone's ready, kill the mobs to start the platform.
Lancer tanks can activate Guardian Shout when the party is almost ready.
↿ Back to top ↾
Defense
Thulsan adjutants are invading!
Bonus Point Opportunities:
| +1000 | destroy a contaminated crystal (Ificio Shard; the ones on the edge of the platform that you whittled down just now) |
| +1000 | kill a monster with a barrel explosion (lure the BAMs into these for fast kill times, those throwable bomb consumables also work for breaking the barrels, but tanks can generally use leashes or death from above instead) |
| +2000 | kill the Bloodfang Hydrath (BAM #1) |
| +2500 | kill the Darkheart Juggernaut (BAM #2) |
| +3000 | kill Emberhorn Fangspawn (BAM #3) |
| +4000 | kill Kaidin (BAM #4) |
| +100 | knock down a teralith |
| +1500 | leave the teraliths alive upon platform completion (awarded per teralith alive, so max is 4500 for leaving all three alive) |
| +5000 | clear the platform without letting the center crystal break |
| +3000 | keep crystal health above 75% (if no message appears saying the crystal is starting to crack, you're good) |
| +35000 | complete the platform with more than five minutes to spare (for every additional second over five minutes, another +50 points are added) |
| -2500 | let the center crystal break |
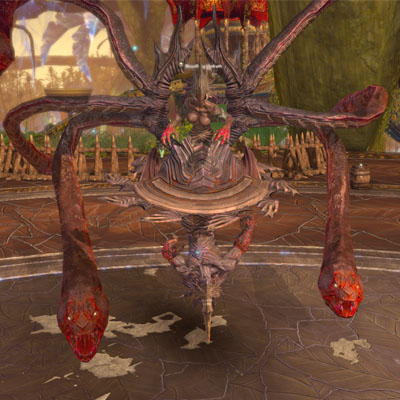
As soon as healer kills the mobs in the center, break your respective crystals. TANK should grab aggro as soon as possible from the hydrath that just spawned at the northeast. Remember that the center crystal is constantly generating aggro, so an orange aggro circle isn't enough, you'll likely need to go through your rotation as you kite him to keep its attention. Get the aggro you need (usually enough attacks to get it down to 90% health) before luring it to the barrels on the northern side of the platform. Bring it within range of two or three of the barrels before leashing/death from aboving the barrels (lancer tanks should make sure you are out of range of the barrels, warriors can just death from above the barrels since the invulnerability frames will keep you save). As soon as you've killed it, head to the southern spawn point and wait there jumping.
DPS & HEALER should not interfere with this whole process and should instead congregate northwest, where the juggernaut will spawn. It is the second BAM on the platform and will spawn immediately after the tank kills the first BAM. Drop your slows and damage as soon as it spawns in. Teralith 1 (northeast) will likely spawn in at this time, so when it does (there will be a notice on your screen), DPST should break off to go keep that teralith in permanent knockdown (be careful not to kill it, cast only your knockdown skill as it goes off cooldown). Once the juggernaut is dead, have the rest of the DPS join DPST up on the northeastern side and just wait there jumping (you've been doing that throughout this entire dungeon right?), only helping out the DPST if the teralith gets outside the spawning area. The HEALER should wait at the northwestern spawn for the second teralith.
DPST should make sure you do your best to knockdown the teralith so that it gets knocked back to the edge of the platform, as the last BAM will be spawning in that location, and you don't want to accidentally kill the teralith with your bigger aoe skills if possible.
The third BAM, a fangspawn, will spawn south as soon as the juggernaut dies. Have the TANK grab as much aggro as possible as soon as it appears (you might need to go through your full aggro rotation once or twice, this one is very picky). Once it's onto you, kite it to the southwestern barrels and hurt it with the explosion (try and get it within range of around 4 barrels, as the number of barrels that explode near it affect how much health it loses; 4 will push it below 50% health). This won't be enough to kill it, so grab a bit more aggro then kite it to the southeastern barrels to finish it off (go for at least 4 barrels in range again, mandatory if you weren't able to do so with the first set). Once it's dead, immediately head to the northeastern spawn to help kill the final BAM and/or help knockdown the first teralith.
HEALER should be using their knockdown skills to keep the second teralith that spawns northwest in permaknockdown (doesn't hurt to swap a glyph out for decreased cooldown if you haven't already). Once the third teralith spawns south, you'll need to juggle knockdowns between the two. Use sleeps, stuns, and slows as necessary. Always keep an eye on both teraliths and hope your damage dealers and tank can kill the final BAM before both teraliths reach the middle. Remember that teraliths gain knockdown resistance each time they are knocked down. A good tactic is usually to spam knockdowns on the second teralith until you're notified that the third teralith has spawned in. Wait for the second teralith to get up from your last knockdown and sleep it before running over to the third teralith and knocking down that one a few times until your first sleep wears off (click on the teralith so you can keep track of this!). At that point you can use your own judgment when juggling teraliths.
DPS & TANK should be wailing on the last BAM up northeast as soon as it spawns; throw all the slows and endurance debuffs you can onto it, and always keep them stacked. DPST should be bouncing back and forth between the BAM and his/her teralith at this point unless it becomes clear that there won't be enough damage to finish the last BAM off before it reaches the center. The same goes with the tank and his/her teralith if the healer is only dealing with the second. If the healer has no problem dealing with the second and third teraliths alone, it's usually a good idea for the TANK to take over knocking down the first teralith so that the DPST can join the other DPS in killing the last BAM.
Once the fourth BAM is dead, THE WHOLE PARTY should continute jumping and knocking down teraliths (they can still destroy the crystal if they get too close) until the platform finishes and the crystal disappears. DO NOT HEAD UP THE RAMP TO THE FINAL PLATFORM, as stepping onto the final ramp will automatically start the last platform.
Over the course of the platform, the barrels will respawn after they have been blown up. If you have a warrior or mystic in your party and you have the time to spare, you can summon a shadow or a thrall and send it off to attack a set of barrels. Since these summons also count as monsters, you'll still get the 1000 points from their deaths. Just make sure to verify with your tank which sets of barrels he/she doesn't need anymore after some of the BAMs have died (in other words, you should NEVER destroy barrels with summons at the start of the platform). Also, you obviously want to make sure no one is standing near them when you do send your suicide summons off to their deaths.
↿ Back to top ↾A Note on Other Tactics
You may come across some groups (especially if you PUG your run) that have the tank aggro and kill all three BAMs with all three sets of barrels while the dps focus on the fourth BAM when it spawns in. This is not recommended for many reasons. Since the tank needs to get to all three BAMs, get aggro, and kite to the barrels, the whole process takes longer than if the dps just burned second BAM down and killed it with a normal attack (both bonuses give the same amount of points). If the tank doesn't circle counter-clockwise for barrel order during this as well, even more time is lost. In addition, these BAMs regenerate health, so if the tank doesn't have enough damage to finish off the fangspawn, even more time is lost if a damage dealer needs to come over and help or you need to wait for a set of barrels to respawn. The only real time when this tactic might be viable would be if the damage dealers are incredibly weak, but then again, if you can't get the second BAM down before it reaches the crystal, you likely won't be able to do so with the fourth either.
Platform 3
PREPARATION
EVERYONE ON ANARCHIC ARMOR CRYSTALS
DPS ON BAM DAMAGE CRYSTALS
TANK ON AGGRO CRYSTALS (whatever helps for aggro generation)
HEALER ON WHATEVER CRYSTALS YOU USE WHEN HEALING
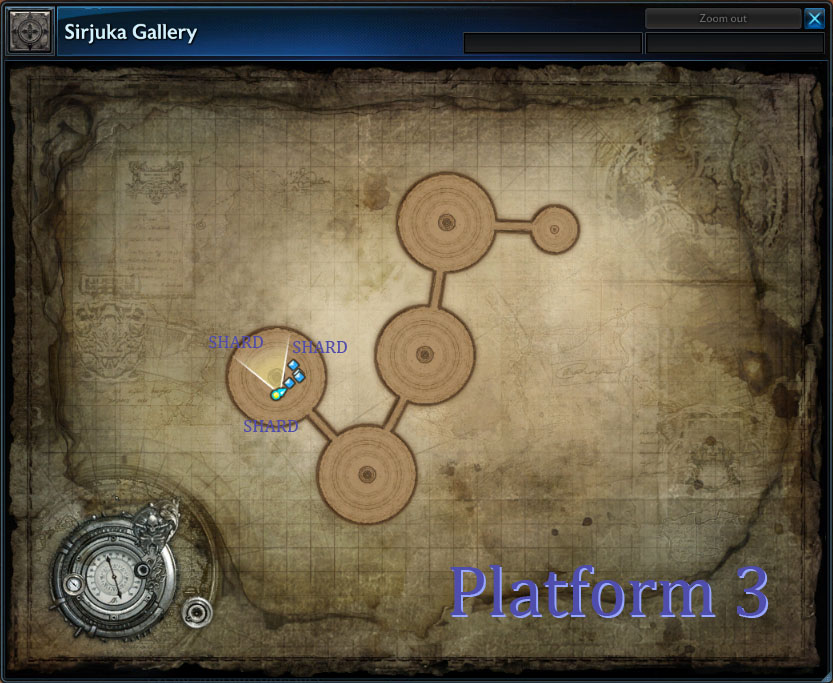
On this final platform, there will be a BAM in the center attacking the center crystal (Barkud). He does damage, so only venture onto the bridge leading to the platform once everyone is ready. There are also three shards on the edge once more, but this time they are surrounded by some mobs. These mobs do no damage, but can knock players down very easily. On this platform, you want to ignore these three shards and their respective mobs if at all possible.
Barkud has high crit resistance, so decide beforehand whether to go crit or power depending on party composition.
TANKS should note that it is important to both keep aggro on Barkud for the entirety of this platform, and get it back quickly at a moment's notice. Tanking position is important, as Barkud loves to do forward and backward leaps that can sometimes hit the crystal if you aren't careful. Get him as far away from the center and edge shards as possible before tanking Barkud laterally to the center crystal.
For this platform, if HEALERS were going for the saving a party member at critical health bonus points, it is recommended that they no longer do so, as this boss hits way too hard for it to matter, and you'll likely end up getting these points on accident anyway.
For dps warriors and healers up for a challenge, the warrior can strip his/her health away to below 5% health before going in.
↿ Back to top ↾
Defense
Fools! Protect the Contaminated Crystals!
Bonus Point Opportunities:
| +500 | kill one of the normal mobs that is near a shard |
| +3000 | kill one of the larger mobs that is near a shard |
| +1500 | kill the little ghost that comes out of a crystal shard on the perimeter when it breaks (avoid breaking these crystal shards in the first place, as the potential points you can get are higher) |
| +1000 | deal more than 500k damage to Barkud in a single hit |
| +1000 | hit Barkud with death from above while under 5% health (WARRIORS only, fairly risky, if the warrior is tanking don't even think about it; also has a cooldown of around 30 seconds, so you can't just spam it) |
| +30000 | kill Barkud within the time limit |
| +2000 | defeat Barkud with the help of the dragon's fire breath debuff |
| +5000 | protect the center crystal without having to destroy any of the surrounding crystal shards |
| +30000 | complete all platforms successfully (all three center crystals on all three platforms intact) |
| -5000 | let the center crystal break |
This whole platform is about keeping aggro on Barkud, so the TANK should be the first to head in once everyone is ready. Have the tank immediately pull aggro and get Barkud away from the crystal. Tank him in a position away from both the center crystal and the contaminated shards off to the side, and be sure to hold the boss still as much as possible so your dps can wail on him. If you ever see messages appearing on screen, expect to lose aggro pretty soon and be prepared to pull aggro back quickly. Spam your aggro rotation and/or have all of your threat generating skills on cooldown when possible during this fight. DPS & HEALER should fight Barkud like any other BAM, and contribute stuns and slows as necessary to help keep him in place.
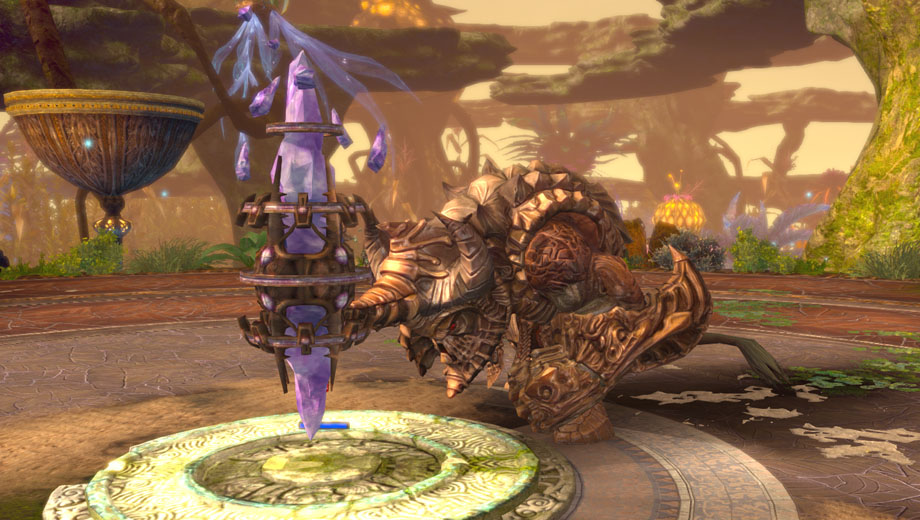
If you feel that your point total isn't high enough (at least 174,000 going into the third stage is ideal for rank 1) and you can sacrifice some damage, have one or two dps go over to the shards to kill the mobs around them, but NOT THE SHARDS THEMSELVES. Remember that these mobs deal no damage but have high knockdown capabilities. Breaking a shard will lose you the potential 5000 points, but each shard releases a ghost that can be killed for 1500, so you can earn back 4500 of the points lost. Breaking the shards will also give your party a minute-long damage buff each (one that you hopefully won't need). So if you happen to accidentally kill one shard, make sure to kill the ghost that comes out as well before killing the other shards and their ghosts as well. Generally the healer will run around to get the ghosts. If the damage on Barkud turns out to be insufficient, the damage dealers who went over to the shards should be ready to come back onto Barkud at moment's notice (generally if you can make it past 50% health by the two minute mark, you'll be fine).
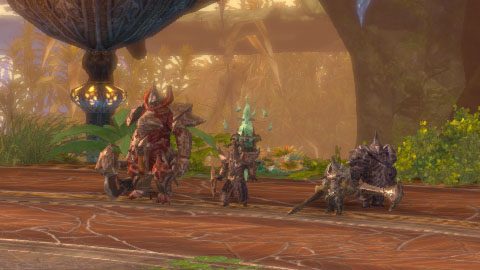
THE WHOLE PARTY should watch out for the tells on Barkud. Other than the normal BAM attacks, Barkud has two sets of jumps that make it annoying to keep in place. For instance, right after Barkud does a single ground pound with both fists, it will immediately jump backwards for a bodyslam, and then jump forwards twice as far. Another example would be after Barkud raises both fists in the air and pummels the ground for a while with the screen shaking; it'll often do a forward jump right after. Depending on its positioning, you'll want to either throw all the stuns you have at the right time or let Barkud jump further away to help with repositioning.
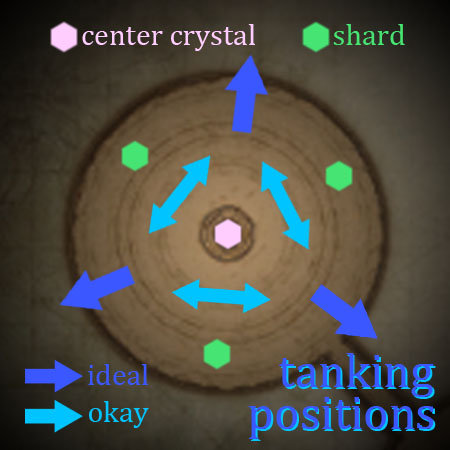
As mentioned before, the TANK'S priority should be to keep Barkud's aggro on himself/herself and off of the crystal. Once that's no longer a problem, you can start thinking about where to position Barkud. Because of its forward and backward jumps, you want to make sure that Barkud doesn't accidentally jump on top of either the center crystal or the surrounding shards. The best place to do so will be between two of the shards with the tank with his/her back against the edge of the platform. At this distance, the backflip bodyslam move will not reach the center crystal, and you will be able to block both of the forward jumps without worrying about boss movement. Don't forget to keep up aggro though, since it'll be bad if Barkud turns away from you and heads toward the center crystal. If Barkud is acting noncompliant, you can try tanking it laterally between the center crystal and one of the outlying shards. That way, if it does happen to jump forwards or backwards, it won't jump onto any of the shards and you can try to force him up against the wall.
Barkud hits hard. Very hard. Two or three of its attacks are enough to kill pretty much anyone in the party. Its bodyslams from jumps do an extraordinary amount of damage as well. Ranged damage dealers and healers should never stand directly behind or in front of the boss without any good reason unless they are familiar with the tells of the boss and can dodge away when necessary (I've seen plenty of clothies get one-shot in my time). Melee damage dealers should learn the tells as well, as the backwards jump will still hit you if you stay in the same place directly behind Barkud while dealing damage. It is important for all party members to stay alive at this point, as multiple deaths can push you down a rank fairly quickly. If you brought potions along, now is the time to use them. Then again you should have been using consumables throughout this dungeon anyway.
If any warrior dps decided to get their health dangerously low below 5% (you can click on the health bar to switch between fractions and percents), they can run in with the tank for a quick death from above before the healer gets their health back up for the boss fight (have them locked-on and immediately heal them after they get the bonus). If the warrior is confident and knows the boss well enough (and the party is fine with it and can sacrifice the damage), he/she can just remain at below 5% health with their combative strike spam and death from above the entire fight for even more points (the points will likely offset the points you lose from dying, but you still need to make sure you have enough damage for Barkud should the warrior die).
At below 10% health, Barkud will run to the center of the room next to the crystal and a dragon (Jermir!) will arrive. As you approach this percentage (around 15%) you want to stop using any stuns and attacks that apply a slow, as you need Barkud to run to the center and make it in time to be breathed on by Jermir's dragon breath. Keep up the damage if you wish but be sure to not use stuns and slows, and leave Barkud alive long enough so that the dragon can breath fire onto him. As soon as Barkud reaches the center, everyone should switch to ONLY normal attacks, since once Barkud gets hit with the dragon breath, it will be one-shottable, so use normal attacks from that point on to get both the dragon-assist bonus and the normal attack bonus. If you notice that Barkud doesn't immediately die from your normal attacks after the dragon has breathed its fire and disappeared, you didn't make it in time for the dragon-assist bonus, so just use skills some more before you normal attack finish it off so you at least get that bonus. If your party is comfortable with it and you have the time to spare, you can start to tank Barkud closer to the crystal when it gets near 10% so that it has more time to run to center for the dragon breath.
Now that Barkud is dead, the gallery has officially ended. Congratulations! Let's see how well you scored.
↿ Back to top ↾Ranking and Rewards
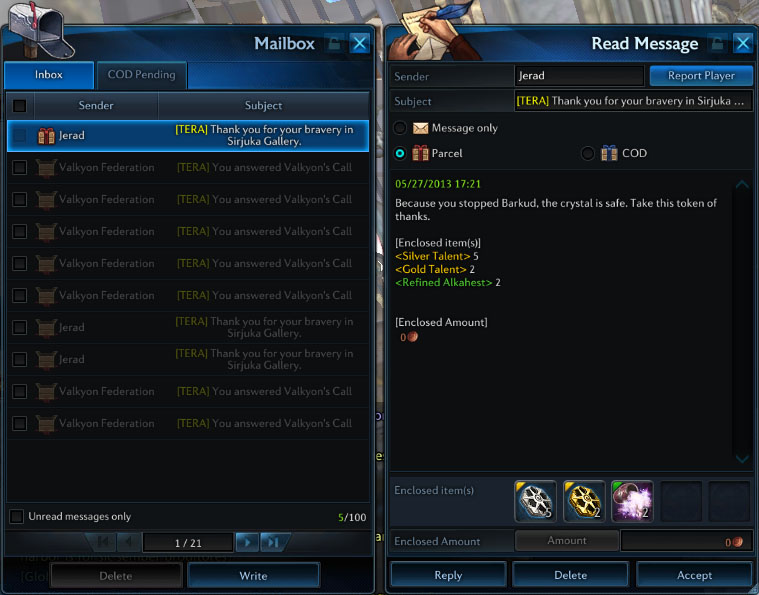
All rewards are claimed in parcel post upon completion of the dungeon. Here's a sample post from one of my recent Rank 2 runs.
Rank 5: (1 to 49,999 points)
- 2 Silver Talents
(yes, it is possible to fail a rank 5 with a negative score and get no rewards at all)
Rank 4: (50,000 to 99,999 points)
- 3 Silver Talents
Rank 3: (100,000 to 179,999 points)
- 1 Gold Talent
- 4 Silver Talents
- 1 Refined or Masterwork Alkahest
- chance for either a Thulsan Curio or Chain of Deceit
Rank 2: (180,000 to 239,999 points)
- 2 Gold Talent
- 5 Silver Talents
- 2 Refined or Masterwork Alkahest
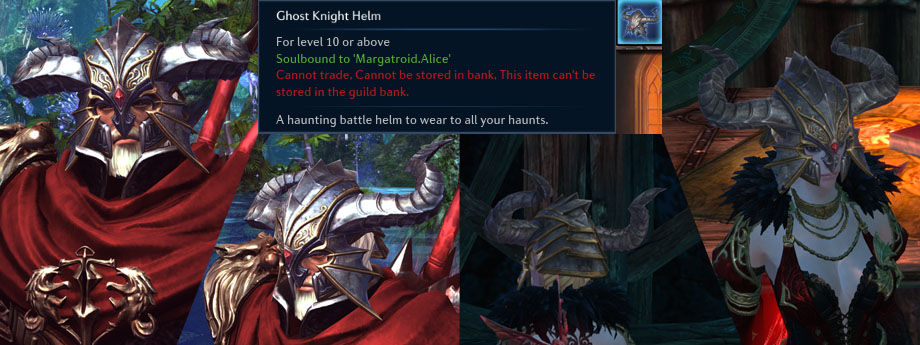
- chance for either a Thulsan Curio, Chain of Deceit, or Ghost Knight Helm
Rank 1: (240,000 points and above)
- 3 Gold Talents
- 6 Silver Talents
- 3 Refined or Masterwork Alkahest
- chance for either a Thulsan Curio, Chain of Deceit, or Ghost Knight Helm
The Thulsan Curio & Chain of Deceit are two possible necklaces that you may get as a reward for scoring high in the gallery. Both have a rerollable stat line (can roll crit rate, crit damage, healing, stun effect, periodic effect, and weakening effect) and an attack speed line, 4% on the Thulsan Curio and 6% on the Chain of Deceit. The Ghost Knight Helm is a cosmetic helmet that you also have a chance of getting, but you'll need a lot of luck with RNG. While the helmet isn't bankable, the necklaces are, so if you get extra necklaces from multiple runs, you can use your bank to give them to your alts! All three of these items are untradable and cannot be stored in guild bank.

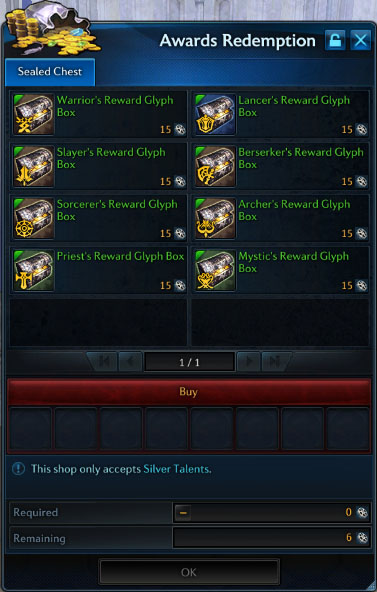
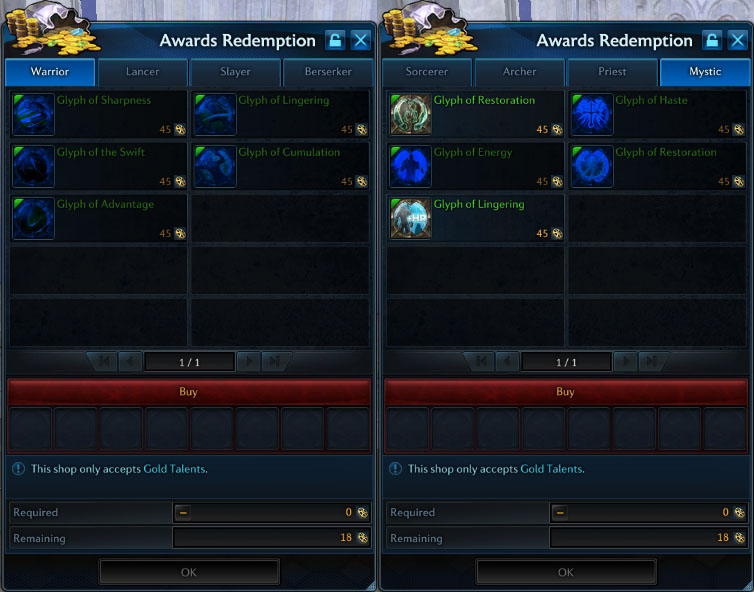
You'll need 15 silver talents for a class-based glyph box which will give you a random glyph from the Temple of Temerity or Sirjuka Gallery or other stuff (including more silver or gold talents, Master Enigmatic Scrolls, and other things). To buy the Sirjuka Gallery glyph you want immediately, you'll need to fork up 45 gold talents for one glyph. Once you pick up your talents from your parcel post, you can head back to the Sirjuka Gallery teleporter area (Collegium Arcane in Allemantheia) to buy glyphs and glyph boxes from the three merchants in the area.
And that's the dungeon! Hopefully you have your own static to learn with or an understanding guild who has members willing to help out with carry-throughs. Don't lose hope though if you can't find parties. As long as each party member knows what to do, it is easy to achieve at least a Rank 3 on any given run. Here's the first Rank 1 run that my guild leader and I ever achieved (he remembered to screenshot it).
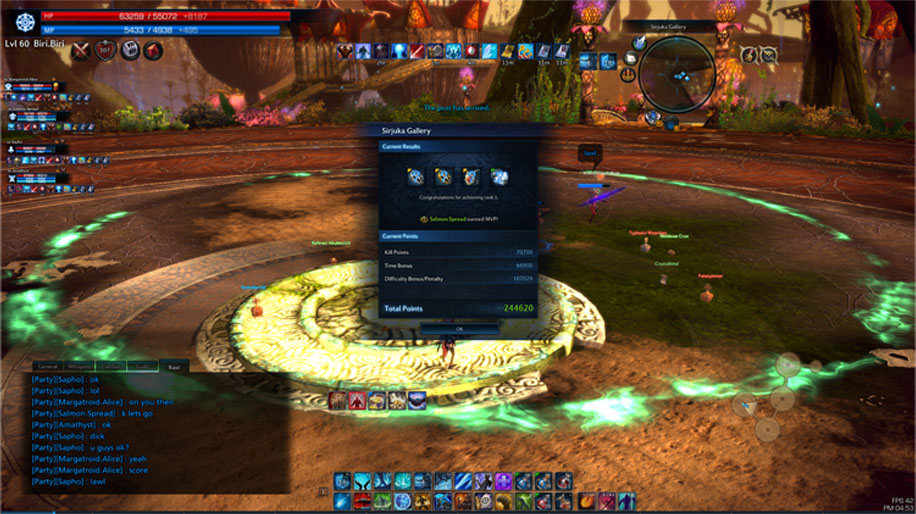
This party was PUG'd with instance matching, so it just goes to show that Rank 1 while not in a static is by no means impossible. Compared to other dungeons at level 60, this one is somewhat more forgiving in terms of difficulty and has a gentle learning curve (though that still doesn't mean you should go in unprepared). Good luck, and have fun!
↿ Back to top ↾Solo Grinding Silver Talents (defunct)
(As Sirjuka Gallery now requires a party of five in order to enter, IT IS NO LONGER POSSIBLE TO SOLO GRIND SILVER TALENTS. This section of the guide is kept in for posterity's sake.)
As long as you get a positive score in this dungeon, you'll achieve one of the five possible ranks. We'll use that tactic to our advantage to get a fast Rank 5 per solo run for 2 Silver Talents each time, which equates to 6 Silver Talents a day for normal players or 12 Silver Talents a day for elite members, even more if you decide to use an instance reset scroll.
Because this method requires little to no skill to pull off, literally any level 60 can do this until they hit their daily cap for this dungeon. If your item level and damage output aren't at a level where you can help out a party, you can still go in solo for the 2 silver talents each time to help you on your way to master glyph boxes.
How to Do It
Take off your chest, boots, gloves, and earrings. Remove any crystals and zyrks in your weapon and rings. This tactic involves dying on purpose, so we need to lower our defense as much as possible while keeping our attack power moderately high. We also remove crystals and zyrks since we don't want to lose any to dying.
Now you're ready to cheese Sirjuka Gallery! Head on in and go to the first platform. Head to any shard you want (remember which one) and get it down to low health as usual. Then go over to the mobs in the center and whittle them down. Once you're ready, kill the mobs. Immediately JUMP for the bonus, then dash over to your prepped shard and break it. Get back to the middle of the platform ASAP, and stand next to the center crystal while the red mobs swing at it. Since your defense is now nonexistant, the mobs there should kill you fairly quickly. As soon as you die, the dungeon will end (since you went in solo) and you'll receive your reward of 2 Silver Talents!
So why does this work? Destroying the shard on the edge of the platform yields you 1000 points, but your death at the end takes that same amount away, leaving you with zero. However, you jumped! The 10 points from the jump pushes your score into the positive number range and gets you your Rank 5. Cheesing has never been more fun!
After you die and receive a notice of your shameful Rank 5, if you want to keep farming the gallery for more silver talents, DO NOT RESURRECT IN TOWN. If you do, your dungeon will still be considered in progress and you won't be able to reenter the teleporter in Allemantheia. Instead, type /reset to reset all of your instances. This will reset Sirjuka Gallery and automatically teleport you outside of the dungeon for another solo run! Don't bother getting your stamina back up, since you'll be dying again soon anyway.
If you have relatively strong attack power (aka. if you aren't a mystic like me), you can solo farm the dungeon slightly faster using another tactic. After you've unequiped relevant armors as noted above, head inside and kill the mobs attacking the center crystal. Afterwards, JUMP and immediately head over to one of the red mobs that just spawned in. Start killing it and finish it off WITH A NORMAL ATTACK. Then go back to the center and die as usual. Since the normal attack and shard bonuses are both 1000, both these methods are essentially the same. Just remember to JUMP and not screw up your normal attack finisher.
↿ Back to top ↾Change Log
2013-05-27 ~ guide posted
2018-04-17 ~ reuploaded to personal website, fixed some stray typos and slightly reformatted document