http://teratoday.com/content/tera-guide/tera-class-guide/tera-warrior-advanced-tanking-guide-lostguru
(This is a reupload of my TERA Warrior Advanced Tanking Guide from 2014 that was hosted on TeraToday before it shut down. It is here solely for posterity and will not be updated. I don't play anymore, sorry!)
Overview
lostguru plays TERA US on the Ascension Valley PvE server. While not as active as before, he still logs on once in a blue moon to help out friends and guildies. If you're also on Ascension Valley and want to get in touch, your best bet is to ask for the "Guardians of Velik" guild or anyone that knows "Margatroid.Alice".
Welcome to a more in-depth look at endgame warrior tanking. This guide assumes basic knowledge of tanking, and is appropriate for current warrior tanks who want to up their game, or seasoned lancers who've always wanted to give warrior tanking a shot. If you're just starting out and have no clue where to start, I highly recommend reading SolidGold24k's beginner tanking guide (dead link), which will get you started on warrior tanking and our tanking mentality. This guide is for those at endgame who are already familiar with warrior tanking, but are looking to go the extra mile and push their limits.
I'll start out by discussing tanking mechanics and general skill usage, then go into glyph choices and setups. I've separated the two because its important to know about the uses each of your skills have before you choose how to glyph them, as this will affect your play style. A very short section on equipment is included at the end.
Table of Contents
About Aggro
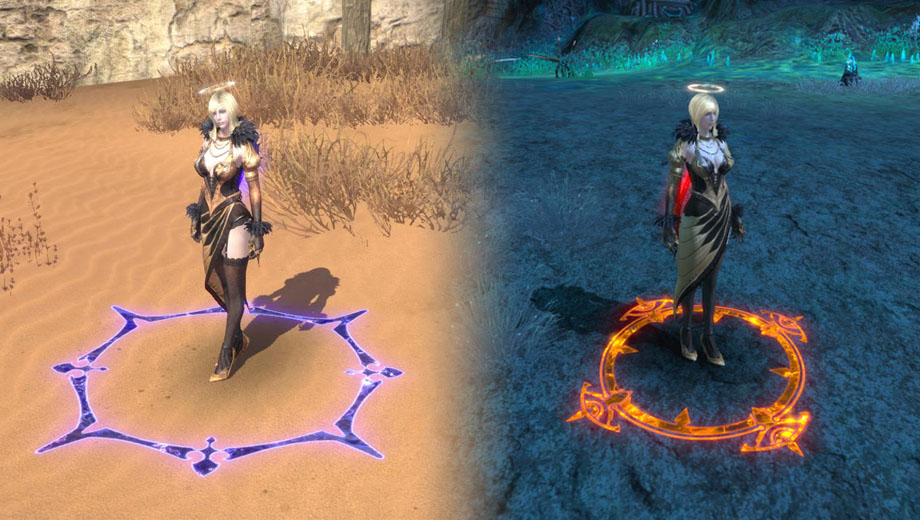
Aggro (also known as threat or hate) in Tera does not work like some other MMOs with tanking mechanics. It degrades over time, and assuming your damage dealers are equally skilled, glyphed, and geared with proper equipment rolls, they will pull off of tanks with big hits. All party members will have a certain amount of a boss's aggro at any given time, and whoever has highest aggro value will have an orange circle under his/her character body. The boss will focus its attacks primarily on whomever has that orange circle under him/her. Ideally that person will be you, the tank. If you see a purple circle under you or a party member, that isn't aggro related, the boss has simply chosen a random party member to target their next attack with. They will return to attacking whomever has the orange circle after they have finished that attack string.
In Tera, power is threat. The more damage you deal, the more aggro you build up. In the case of healers, heals will also build up aggro from casting heals on party members. This is how it is possible for party members to pull aggro off of the tank if they crit for a high enough amount of damage. The percentage of a boss's aggro that a player has will depend on how hard he/she hits/heals for, as well as how often he/she hits/heals for. However, some equipment and skills will offer aggro modifiers that increase or reduce the amount of aggro players generate. These modifiers affect the amount of aggro skills pull, and when compared to the damage lines you can roll in the same slot, generate more threat than the aggro from damage you get with a damage line. As tanks, lancers and warriors often do not do as much damage as their DPS party members, but are able to keep aggro with the help of these threat modifiers. A good mix of high damage (as high as you can get it anyway) and high aggro modifiers are needed to keep aggro; this is why your weapon's enchantment level and rolls help out immensely when you tank.
There are many discussions and speculations about how the threat system in TERA actually works, and you can easily find some through based-god Google. Ultimately however, knowing in-depth how aggro works will have little impact on your tanking ability. All it comes down to is that orange circle underneath your character. If it's constantly under you, tell your party to turn it up a notch. If it's not, it's something on your end, and knowing how the threat system works won't help you out much in that regard. Everything is relative, and the KISS principle is king (Keep it simple, stupid. - coined by the US Navy in 1960; states that most systems work best if they are kept simple rather than made complicated, therefore simplicity should be a key goal in design and unnecessary complexity should be avoided). Gear-wise and glyph-wise, what it always boils down to is the following: "use as much attack speed as you need for you to tank comfortably, then add on as many direct threat modifiers as you need for you to hold aggro properly, then replace what you can with damage from power or criticals while still being able to hold aggro well".
Remember, if you tank a boss fight without losing aggro, it doesn't mean you're a good tank. It means your damage dealers need to up their game. Damage dealers are there to do damage, and assuming you and your damage dealers are equally skilled, equally geared, and have equipment properly rolled, they WILL be pulling off of you if RNG (Random Number Generator - used to describe something left up to luck) grants them a high string of crits. Like SolidGold24k mentioned in the beginner's guide, tanking is not solely about holding aggro. That's naturally expected of you. A tank's worth is judged by how quickly you can pull aggro back after those million(s)+ berserker crits. So don't feel bad about occasionally losing aggro. It means the damage dealers are doing their job. But if you can't get that aggro back quickly, you have a problem and the boss can wreck some serious havoc on your party.
Most warrior tanks should already be familiar with using just Torrent of Blows on cooldown to hold aggro. But remember, aggro coming from power and damage also applies to you as a tank. As a warrior tank, you'll need to use that to your advantage even more so.
↿ Back to top ↾Skill Discussion

Defensive Stance is the warrior tanking stance. Your endurance and balance receive a boost, and the aggro that ALL your skills generate goes up by 65% (the buff tooltip has a typo). Being in this stance also gives you the ability to use Cross Parry, the warrior block and the equivalent to the Lancer's Stand Fast skill.
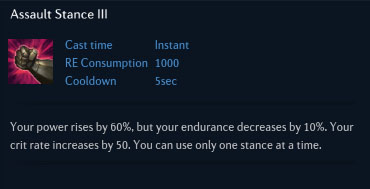
Assault Stance is the warrior DPS stance. At the cost of 10% endurance, you gain 60% attack power and 50 crit rate. You should not be in this stance while tanking, as your skills will not generate aggro and you have no access to Cross Parry.
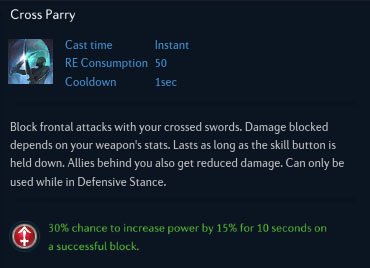
Cross Parry is your block. Of course you should be using it. Your goal should be to learn boss attacks as quickly as possible so that you know how long you have time to attack before you need to put your block up and down. Also remember that you can use Cross Parry to cancel attack animations, meaning if a boss attack is incoming and you're in the middle of a skill, pressing Cross Parry during some frames of that animation can stop your skill in the middle of its cast to block (the skill still goes on cooldown however). Luckily, like the berserker block, warrior block is nearly instant unlike lancer block, meaning we can literally just tap Cross Parry as incoming attacks arrive and save a bunch of RE. If you're learning a boss, watch for when the successful block icon "dings" while you block that attack (there are a few exceptions to the rule, mainly with attacks that purely inflict just a status effect and no damage). Those are the only times in that animation when you need to have your guard up, and you can attack the rest of the time. Keep in mind that because of the cooldown on Cross Parry, we can't use Cross Parry whenever we want to cancel out of attacks like Lancers can, so be sure you have a finger on Evasive Roll of Death From Above should the boss surprise you right after you've block-cancelled something. Or better yet, just watch when you Cross Parry cancel.
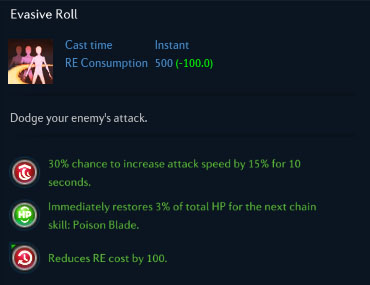
Evasive Roll should be avoided as a tank, but not ignored. Many attacks endgame are unblockable and occur in quick succession. While your Death From Above skill covers most bases, you'll find times when you need to dodge backwards or to the side to dodge another successive unblockable attack. Never dodge through the boss as this will turn the boss around towards the rest of your party. While Evasive Roll can also be used like Cross Parry to cancel animations, it also moves you a nice distance and gives you invulnerability frames, so keep that in mind. If possible, you'll usually want to time your Evasive Roll so that you i-frame attacks rather than outrange them, as this will keep you close to the boss so that you can resume your job immediately after the attack ends. If the boss is flailing all around the room and has managed to press itself against the wall, you can roll through the boss to get to the wall so that you can wall-tank the boss there and hold it still for your party members. Don't be afraid to use this skill for boss positioning.
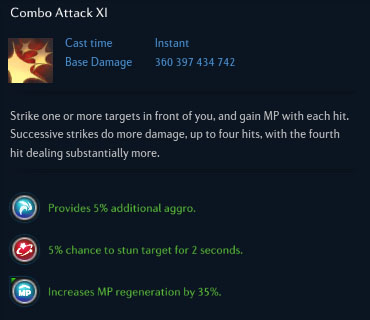
Combo Attack should be used if you're running low on MP or have absolutely no clue what you should be doing in-between blocks. It's basically your filler skill if everything else is on cooldown. If you know a big boss skill is coming up that you want to focus on dodging, you can just hold down the combo attack button with your other finger on your block or dodge and directional key in preparation for the attack. Once you're comfortable with the boss however, and are using nostrums and MP potions, you should rarely be using Combo Attack, if at all.
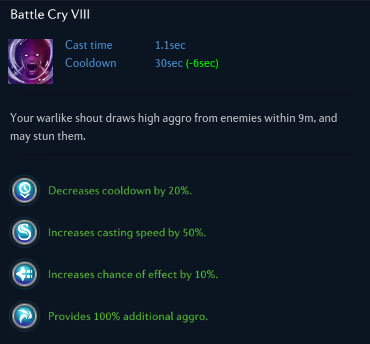
Battle Cry is your shout and AoE stun skill. This skill is NOT akin to the Lancer's Challenging Shout. This is not your main tanking skill. In PvE this skill is more akin to an RNG stun that also happens to pull a little aggro and cost you no MP. It has a 9m radius, so you can pop it off if you're pulling a crowded room to aggro all the mobs, but otherwise, don't rely on it.
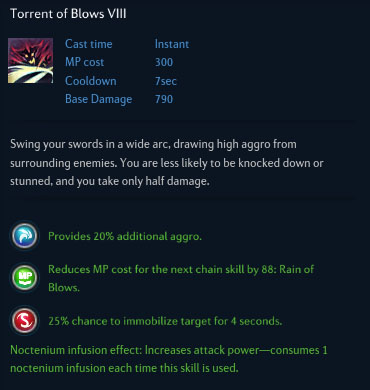
Torrent of Blows is without a question your main tanking skill. Damage received is halved during execution, and it has a nice hitbox and a little bit of forward movement. It also generates a huge amount of aggro and returns a nice chunk of RE to you per target hit. The damage the skill deals is calculated with the single base value, then split in a 3:2 ratio between the first (60%) and second (40%) hits.
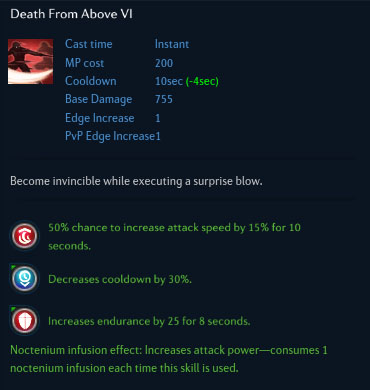
Death From Above (abbreviated DFA from now on) is your other main tanking skill. Not only does it return a set amount of RE when used, even when it hits air, it also does damage and gives you some free invulnerability frames when casting. Useful for all occasions, especially if you need to use skills during a boss attack for emergency RE. After you're familiar with boss attacks, you can block the first few attacks in a boss attack animation and DFA the last few hits (or even the whole thing), such that you'll pretty much never run into RE problems again.
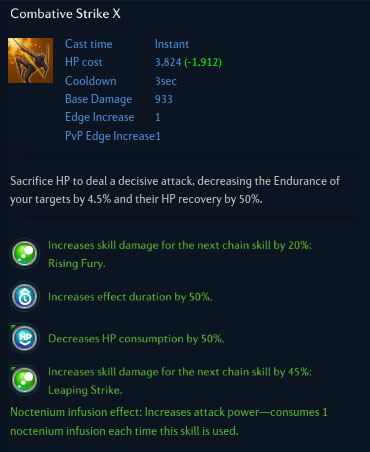
Combative Strike is excellent utility as a tank. Not only does it give back a respectable amount of RE, but it's also very fast, has a low cooldown, and uses HP instead of MP, meaning you can use it if MP is a problem for some reason. Its own damage is also decent, and the fact that it's your main starter means you'll be using it a lot. The 4.5% endurance debuff it gives lasts 15 seconds from when it was last applied. It only stacks once, but it still greatly aids in party damage. Note that the lancer Debilitate endurance debuff will overwrite the Combative Strike endurance debuff if it exists on a mob, and while the Debilitate version only takes 3% away, it stacks up to three times for a total of 9% endurance debuffed.
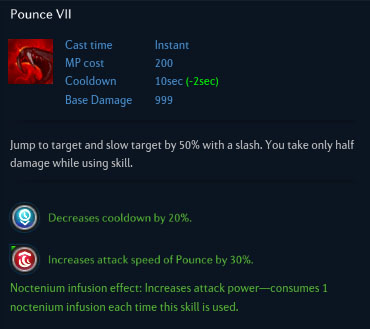
Pounce has high base damage. This makes it a great tanking skill. Not only is it your other starter, it also halves damage received during execution, making it an even better tanking skill. Pounce→Rain of Blows is a nice hard-hitting damage mitigation combo you can use while tanking if you're forced to attack while the boss is doing the same to you.
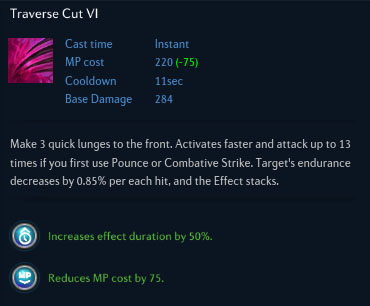
Traverse Cut will be used mainly for its endurance debuff, although it does build a nice amount of Edge. The damage from all 13-hits is respectable if you crit a good chunk of them, but you'll usually have to chain right into Blade Draw unless you want to stack the debuff or you've got the time for all of its hits. One stack of Traverse Cut's endurance debuff strips 0.85% of a mob's endurance away, and this effect can stack up to a maximum of 13 times for a total of 11.05% endurance debuffed. This debuff lasts 18 seconds from when the last hit of Traverse Cut was applied, and as long as you land another hit within that time frame and the mob doesn't resist its effect, you will refresh the debuff and keep it alive. The damage the skill deals seems to be calculated with the single base value, and then divided by two to determine the damage of each individual stab, regardless of how many there are.

Blade Draw is one of your best friends even as a tank. Power is threat, and this is a skill that not only chains after many of your attack strings, but can also be relied upon as your primary source of damage. Pray to RNGesus that this skill resets. The damage the skill deals is calculated with the single base value, and then split in a 3:7 ratio between the first (30%) and second (70%) hits.

Rain of Blows is useful for its 30% damage mitigation, not to mention its attack power and fairly large hitbox. Along with Blade Draw, it's the bread 'n butter of your damage output, so use it when you can. The damage the skill deals is calculated with the single base value, and then split in a 2:1:1:1:1:2:2 ratio between all seven hits. The 1st, 6th, and 7th hits are 20% of the total each, while the 2nd through 5th hits are 10% of the total each.
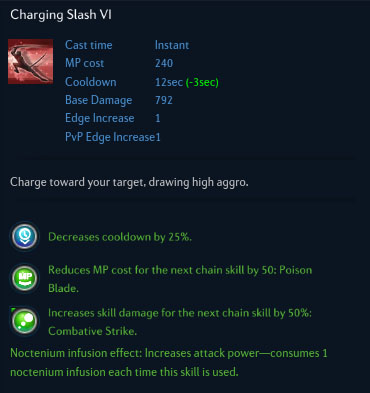
Charging Slash should be one of your favorite skills as a tank. It generates edge, draws a decent amount of aggro, and can be used to chase down mobile bosses (it'll take you around 19m max distance). On more stationary opponents, Charging Slash→Blade Draw is a fast, high aggro combo that can be used as part of your regular rotation to aid you in holding aggro.
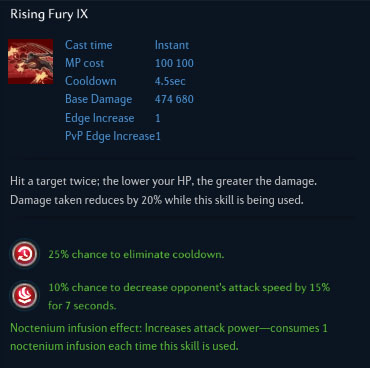
Rising Fury should be used regularly, but selectively. The first press casts two sword swings that move you forward quickly and hit all around you (good for positioning yourself and bosses). The second press finishes off Rising Fury with a swing that gives you back a nice chunk of RE. Damage is reduced by 20% during execution, making it another great damage mitigation skill if your other skills are on cooldown or you've been pressured and had no time to plan out what skills to use during the next attack, Rising Fury is also great go-to option because its relatively low cooldown means it'll generally be available for use, especially if you're looking for something to chain into Blade Draw. Its other perk of doing more and more damage as you get lower and lower in health should also be noted (even though it's very slight). The damage the first skill press deals is calculated with the first base value, then split in a 1:1 ratio between the first (50%) and second (50%) hits, while the second skill press deals damage calculated from the second base value.
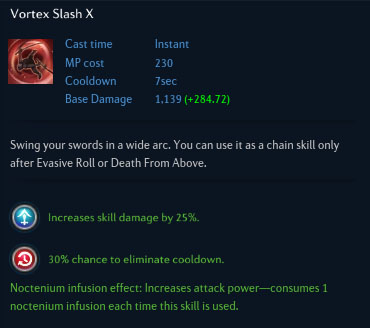
Vortex Slash has good base damage and executes fairly quickly, but can only be casted in a limited time period after an Evasive Roll or DFA. However, it also chains into Blade Draw. If you use one of the previously mentioned skills, try and pull this combo off for a nice burst of damage and aggro.
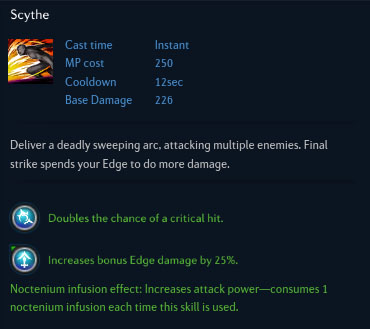
Scythe should only be used as a tank if you're the only warrior in your party. Do the usual and only use it at 9 or 10 stacks; that and pray to the RNG gods. Don't go for backcrits, just cast it in front of the boss. Feel free to cast Deadly Gamble and/or Smoke Flanker before you Scythe if you have the time and the boss you're up against isn't worth your time. The damage the skill deals is calculated with the single base value and becomes the damage dealt by all three hits of the skill. However, depending on the amount of Edge stacked on the target (and any relevant glyphs) at the time of casting, the last hit of the skill is multiplied by a factor dependant on the amount of Edge stacked. For instance, the amount of damage the third hit of Scythe does with 10 Edge stacked and the Glyph of Sharpness on is roughly the damage you deal on either one of the first two hits multiplied by about 16.628 (might expand section or link to different thread later).

Backstab should generally only be used as a chasing skill rather than a stun or a dodge (you have your block, DFA, and evasive roll for that). If a boss has thrown itself across the room, wait until it starts to turn around to look back at the party and backstab in the middle of that turn. This will cause the boss to turn right back around at you and expose its back to your party. If a ranged has pulled aggro you can use backstab to chase after the boss in addition to your Charging Slash.
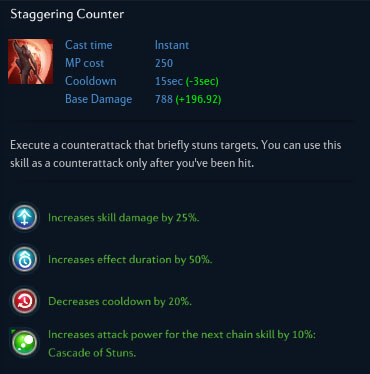
Staggering Counter finds rare uses as a tank. For normal tanking, you'll only be using this if a ranged damage dealer has pull aggro and you blocked recently or got trampled as the boss turned to run at your damage dealer. If the boss has turned around to fire a secondary attack on your party however, you can use Staggering Counter to try and stun the boss out of its animation and turn its attention back at you. There will be certain bosses endgame that you'll prefer to stun out of animations when possible (CoF Cyclops eye laser), but those cases are selective and far and few in-between. That being said however, with endgame bosses that are immune to stuns, this skill is fast, free damage. Since blocking an attack counts as being hit by it, you'll find many opportunities to trigger this skill while tanking. Just make sure the boss is immune to stun before you start spamming this skill.

Cascade of Stuns is a nifty filler skill with nice utility. If not used as filler, you'll generally be using it after a party member has stunned something. Depending on your glyphs and jewelry rolls, you generally won't have enough time to chain this skill after one of your own stuns (mainly Battle Cry as a tank), but if you can, feel free. For its casting speed, its damage is alright. The damage dealt by this skill is calculated in a fairly tricky way. If none of the targets you hit happened to be stunned, the damage you deal will simply be calculated from the base value. However, if the target you hit was stunned, you will deal an extra hit of damage to that target equal to 1/4 of the damage Cascade of Stuns would have done alone. If there are other mobs in the vicinity who aren't stunned, they will have a chance to get stunned (only dependent on their stun resist) and also get dealt an extra hit of damage, except the amount of damage done to each of them is now 1/5 of the damage Cascade of Stuns would have done alone. This fraction seems to go down the more mobs there are that get hit in the vicinity. If you hit more than one stunned target with Cascade of Stuns, you get this effect multiple times, and the stuns seem to bounce off of all the targets (like a cascade -gasp-) who get stunned. Either that or the Cascade of Stuns effect takes place with each of them and spreads out once to the mobs in the vicinity (might expand section or link to different thread later).
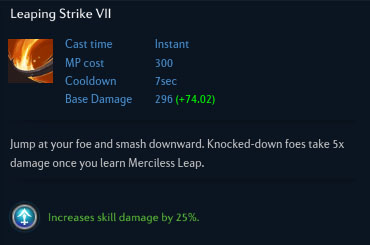
Leaping Strike is a movement skill. That's all it should really be used for. Use it to carry yourself distances or out of an attack quickly. In regards to the actual movement, it takes you 10m forward, and you generally want to use it to flee attacks rather than get right back into the boss, as the idle animation following the leap leaves you quite vulnerable and cannot be cancelled out of.
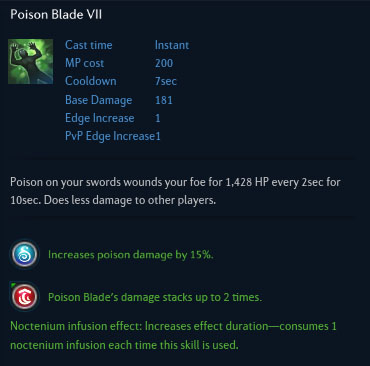
Poison Blade is mainly used as an Edge-generation skill to help out you or any warrior damage dealers you may have. Both its damage and damage over time are rather laughable, but it's fast, stacks edge, and gives back RE. Since tanks have Torrent of Blows to fit into their skill set compared to DPS warriors, you'll often find better ways to deal more damage and stack edge in comparison to Poison Blade, but it's an option nevertheless.
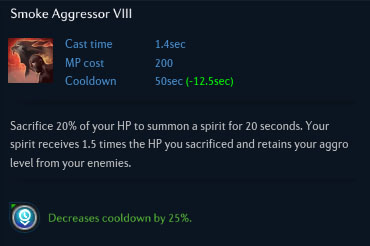
Smoke Aggressor generally has little use as a warrior tank, as it'll take all of your aggro and then go off in a random direction, more often than not towards the rest of your party. It lasts around 20 seconds after you summon it, and its damage is crap too. Other than selective cases in certain dungeons, the main reason you'll ever be using this is to grab a breather from boss kiting if a large chunk of your party is dead. Pop it and go resurrect someone while the boss is distracted by it.
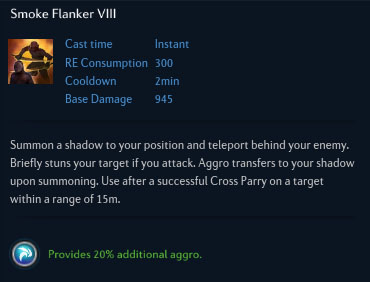
Smoke Flanker is for when you need to take a breather and the boss has just enraged or something and you don't wanna stand in front of it for a bit. Remember that it costs RE to cast and only lasts 15 seconds, so don't rely on it as a instant get-out-of-jail-free card if you're low on RE. It seems to be very hard to pull aggro off of the summoned Smoke Flanker (it might have non-degrading aggro or something), so you're generally safe standing behind the boss and dealing damage for a while. Just be ready to step back in your flanker's place after its summon period runs out.
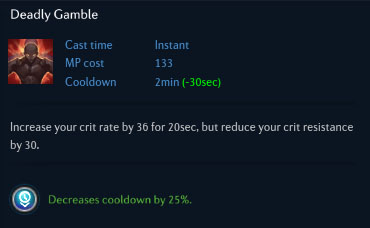
Deadly Gamble is your crit rate self buff, and should be used pretty much as you'd use it as a DPS warrior. Pop it when you know the going's gonna get a little tough to help you hold aggro better.
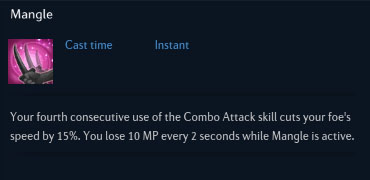
Mangle isn't as useful endgame as most people would wish. Many bosses are immune to slowing status effects endgame, and the fact that you need to pull off four Combo Attacks to proc the speed debuff in the first place means you're losing quite an amount of damage (and therefore, aggro) on the boss. Additionally, once you get comfortable with firing skills off one after the other, even with full stamina, a Greater Infused Charm, and Priest and Mystic MP support, you will still find yourself MP starved if you're actively tanking. Docking 10 every two seconds adds up in the long run, so unless you think you'll ever hold down Combo Attack enough to cast it four times in a row, leave this off.
↿ Back to top ↾RE Discussion
RE allows you to use Cross Parry, Evasive Roll, summon Smoke Flanker, and activate either one of your stances. Landing hits on opponents with certain skills regenerates your RE to various degrees, and the more targets you hit with a skill, the more RE is regenerated. If you land a hit on more than one enemy, RE regen on that hit is multiplied by the number of targets you hit. The one exception to these rules is DFA, which restores a fixed amount of RE everytime it's cast, no matter how many targets you hit (even if that number is zero!). Knowing which skills get your RE back up never hurts, but as long as you aren't holding down Cross Parry unnecessarily, RE management should never be a problem.
If you aren't casting any skills at all (whether you're running, jumping, or standing still), RE will automatically replenish at a rate of 120 RE per tick. The rate at which these ticks occur doesn't seem to be fixed, but occurs often enough that it's not an issue. However, whenever you're casting any skill, whether it hits an enemy or not, and whether you are in combat or not, all the RE that skill regens depends on how many targets you hit with each strike from that skill. This means that if you, for instance, held down Combo Attack while swinging at thin air, you would never regenerate any RE until you either stopped doing so or started to hit something. Activating Cross Parry and holding it down will use up your RE at a rate of 50 per tick, with about .45 seconds in between each tick (1200 RE is used up in roughly 10.75 seconds). If your RE ever drops below 50, your character will automatically stop Cross Parrying until both your RE gets back over 50 AND you let go of and hold down your Cross Parry button again.
The following table lists various skills and the various amounts of RE returned from each of their hits when landed on a single target. Numbers separated by a comma indicate multiple hits from a single press of the skill button, while numbers separated by a Sheffer stroke indicate multiple hits from multiple presses of the skill button.
| SKILL | RE REGENERATED |
 |
16,16 | 17,17 | 19,19 | 50 |
 |
91,91 |
 |
14,14,14,14,14,14,14 |
 |
0 |
 |
180(on cast),0(on hit) |
 |
93 |
 |
0 |
 |
0 |
 |
0 |
 |
0 |
 |
100 |
 |
20,20 | 140 |
 |
0 |
 |
0 |
 |
0 |
 |
0 |
 |
44,44,44 10,10,10,10,10,10,10,10,10,10,10,10,10 |
 |
33,33 |
 |
0,0,0 |
 |
50,50 (get out of Assault Stance you scrub) |
*These numbers were taken from a human male warrior in a PvE setting.
In summary, the only nine skills you have that regenerate RE are Torrent of Blows (182 total), Rising Fury (180 total), Death From Above (180 always), Traverse Cut (130 or 132 total), Combative Strike (100 total), Rain of Blows (98 total), Poison Blade (93 total), and Blade Draw (66 total). Combo Attack does give 154 total if you land all of its hits from four skill presses, but unless you're hitting more than one enemy, just not using any skills and letting the natural regen do its thing will give you RE back faster, if not at the same rate. An interesting thing to note is that the scrubby 3-hit version of Traverse Cut actually regenerates more RE than its 13-hit counterpart, albeit only 2 RE more. It does execute all of its hits slightly faster though, especially if you chain it into Blade Draw, which makes scrubcasting Traverse Cut a somewhat viable option if you're short on RE.
↿ Back to top ↾Glyph Discussion
It's kinda funny and sad at the same time that as warrior tanks we don't gain many useful tanking glyphs from doing Temple of Temerity or Sirjuka Gallery. The main reason we do those dungeons are for glyph point reductions and such, which allow us to use more glyphs at once. Since Temple of Temerity is an easy and fast dungeon to both do and tank, you should at least get all the glyphs from there as soon as possible. The Sirjuka Gallery glyphs are something you can work up to in your spare time.
What makes warriors unique from other classes is our variety of options when it comes to glyphing. While other classes pretty much have a definitive PvE glyph setup for maximum damage, the way you glyph on a warrior will ultimately depend on your own playstyle as well as the bosses and dungeons you'll be planning to tank. While there are obviously some "core" glyphs that all warrior tanks will want to use regardless of how they play, you should always use what's convenient for you. Copying a glyph setup is useless if you don't play according to the style of that setup. What follows will be yet again another giant list of skills and their available glyphs. I'll be listing the advantages of certain glyphs and their use in certain situations to help you pick and choose the right combinations for your tanking needs. I've tested most of the controversial glyphs out, and having done so, I have not seen any particular combination stand out from the rest.
↿ Back to top ↾GLYPH OVERVIEW
Remember that for skills with a Glyph of Power and Glyph of Powerlink, these damage boosts are applied directly to your skill damage, meaning that they look at the amount of damage you deal when hitting a target, and directly increase that number by the indicated percentage. The powerlink glyphs use the term "increase your attack power" in their descriptions, but in reality, they increase your skill damage like the power glyphs do. The two exceptions are Cross Parry's Glyph of the Pump & Scythe's Glyph of Sharpness. Glyph of the Pump boosts your character's power, so the damage increase you see on any one hit will be less than 15% due to how damage is calculated and your target's endurance. Glyph of Sharpness however is still directly applied to skill damage, however the percentage it boosts its damage by is affected by the Edge system.
Glyphs shown in GREEN are all-around great glyphs that will generally benefit all warrior tanks.
Glyphs shown in ORANGE are glyphs that are great to have, but either have limited benefits or only benefit certain playstyles or specific warrior tanks.
Glyphs shown without an altered text color are glyphs you will more than likely ignore as a tank unless chosen for an extremely specific situation.

Combo Attack
(5) Glyph of Threat - Provides 5% additional aggro.
For the minute damage the skill actually does and minute amount of aggro it gives, this glyph won't be necessary. Combo Attack is only filler material anyway.
(5) Glyph of Sap - 5% chance to stun target for 2 seconds.
Handy, but for its glyph point cost it's not worth it. Again, Combo Attack is filler material, so you won't get to see this glyph proc much anyway.
(3 | 2) Glyph of Spirit - Increases MP regeneration by 35%.
If you have spare glyph points with nowhere else to shove them, then maybe you can put them here. Otherwise, if you're not having MP issues, try to put points elsewhere before coming back here.

Evasive Roll
(4) Glyph of the Swift - 30% chance to increase attack speed by 15% for 10 seconds.
Having extra attack speed is nice, but since rolling won't usually be your first choice while tanking, this glyph gives diminishing returns.
(4) Glyph of Restoration - Immediately restores 3% of total HP for the next chain skill: Poison Blade.
Depending on how often you use Poison Blade, this skill can be used in conjunction with the Rain of Blows restoration glyph for nice self-heal potential. Not especially useful as a tank however, since you'll usually be tanking for a party, and parties usually have healers.
(4 | 3) Glyph of Unending - Reduces RE cost by 100.
Probably the most useful of all of Evasive Roll's glyphs, but still somewhat unnecessary since we'll block or DFA attacks most of the time.

Torrent of Blows
(6) Glyph of Threat - Provides 20% additional aggro.
Your main tanking skill better do its job well as a main tanking skill. Expensive, but consider getting it if you're having problems holding aggro with just power.
(3) Glyph of Influence - Reduces MP cost for the next chain skill by 88: Rain of Blows.
No.
(6) Glyph of Binding - 25% chance to immobilize target for 4 seconds.
For bosses that move around, this glyph isn't too bad at all. But it's expensive. Use it selectively. The fact that most endgame bosses are immune to this debuff make it even more useless.

Rain of Blows
(5) Glyph of Power - Increases skill damage by 25%.
High point cost, but very useful for the extra damage. You'll want to use Rain of Blows consistently anyway. I recommend you glyph it.
(4) Glyph of Restoration - Immediately restores 0.5% HP.
Your main HP restoration skill. Restores 3.5% total if all 7 hits land. Generally in a party your healer will take care of the work for you, so you can leave it off.

Battle Cry
(4) Glyph of Energy - Decreases cooldown by 20%.
This glyph is helpful if you use Battle Cry as a part of your aggro rotation. Otherwise, for 4 glyph points it's not really worth it.
(6) Glyph of Haste - Increases casting speed by 50%.
This glyph being expensive as hell makes it debatable. When not used in a rotation, Battle Cry is mostly for pulling bosses back after you've lost aggro, when you no longer need to worry about casting speed since the boss is usually in the middle of turning towards a party member. But when used in your tanking rotation, this glyph helps you squeeze it in between boss attacks.
(2) Glyph of Luck - Increases chance of effect by 10%.
Not a bad glyph for its low point cost, since it helps to turn your Battle Cry into a last-ditch effort stun. Get it if you want to.
(3) Glyph of Threat - Provides 100% additional aggro.
You'll probably only be using Battle Cry just to pull aggro back to you after you lose it; if you are then might as well guarantee that's the case, but for the most part Torrent of Blows and your damage output will be more than enough for aggro holding purposes. For its fairly low point cost though this glyph isn't bad at all. If you do use Battle Cry as part of your rotation, then all the more reason to get it.

Defensive Stance
(6 | 5) Glyph of Grounding - Increases endurance by 20%.
When you don't have many other options to glyph for and you're just starting out and learning how to tank, this is useful for making you less squishy. If you don't get hit often, put the points for this expensive glyph elsewhere.

Death From Above
(3) Glyph of the Swift - 50% chance to increase attack speed by 15% for 10 seconds.
Depending on how often you use DFA (as part of your rotation or purely as a dodge), you can choose whether you think the attack speed is worth it to you or not. Generally if you use DFA often, it's not a bad idea to get this glyph.
(3 | 2) Glyph of Energy - Decreases cooldown by 30%.
Regardless of whether you use it as a part of your rotation or purely as a dodge, for its low point cost, points in this glyph are never wasted.
(5) Glyph of Grounding - Increases endurance by 25 for 8 seconds.
When starting to learn how to tank and getting used to DFA's invulnerability and vulnerability frames, you can flip this glyph on. If you don't get hit at all, put the points in here elsewhere.

Poison Blade
(6) Glyph of Virulence - Increases poison damage by 15%.
Poison Blade's damage over time is laughable, even with all relevant glyphs on.
(3) Glyph of Cumulation - Poison Blade's damage stacks up to 2 times.
Poison Blade's damage over time is laughable, even with all relevant glyphs on.

Leaping Strike
(5) Glyph of Power - Increases skill damage by 25%.
No. Leaping Strike is for movement in PvE.

Retaliate
(4) Glyph of Energy - Decreases cooldown by 20%.
If you're learning how to tank and you're getting stepped on quite frequently, this skill isn't a bad idea. Once you get comfortable though, move these points elsewhere.
(3) Glyph of Power - Increases skill damage by 25%.
No.
(2) Glyph of Influence - Reduces MP cost for the next chain skill by 75: Leaping Strike.
No.

Charging Slash
(3) Glyph of Energy - Decreases cooldown by 25%.
You use Charging Slash as both a boss chaser and an aggro skill with Blade Draw chain. There is little reason not to have it glyphed for cooldown reduction.
(3) Glyph of Influence - Reduces MP cost for the next chain skill by 50: Poison Blade.
No.
(4) Glyph of Powerlink - Increases skill damage for the next chain skill by (20% | 50%): Combative Strike.
The initial 20% damage from the normal version of this glyph will probably not make a difference, but the 50% its master glyph version has is fairly nice to have. Charging Slash will likely be used fairly often during any boss fight due to its speed and distance-covering ability. Since you also use Combative Strike so often, an extra 50% damage every time you use it is amazing, especially for bosses with fast and frequent attacks.

Vortex Slash
(5) Glyph of Power - Increases skill damage by 25%.
High point cost, but depending on how often you use this skill, you can pack quite a wallop. Pair it with the Glyph of Persistence if possible.
(4) Glyph of
Persistence - 30% chance to eliminate cooldown.
More opportunities to create a Blade Draw chain are always nice, and Vortex Slash isn't a bad skill damage-wise to begin with. Pair it with the Glyph of Power if possible.

Combative Strike
(5) Glyph of Powerlink - Increases skill damage for the next chain skill by 20%: Rising Fury.
Debatable. High point cost, but with how often and quickly you can use both Combative Strike and Rising Fury, the damage adds up. Handy for bosses with fast and frequent attacks.
(2) Glyph of Lingering - Increases effect duration by 50%.
Even with its low point cost, with how often we'll be using Combative Strike we won't even need to worry about keeping its endurance debuff stacked on bosses. You can safely ignore this glyph.
(3 | 2) Glyph of the Sanative - Decreases HP consumption by 50%.
Since we use it so often, having it consume less HP per use can only help us. However, depending on how competent your healer is (i.e. if your healer isn't shit), you can usually leave it turned off and just let your healer cover for you (ask them if they notice any differences between you using and not using the glyph). Soloing is another story, but generally, you won't be tanking solo anyway.
(3 | 2) Glyph of Powerlink - Increases skill damage for the next chain skill by (35% | 45%): Leaping Strike.
We only use Leaping Strike for movement. Don't bother with this one.

Rising Fury
(5) Glyph of Persistence - 25% chance to eliminate cooldown.
Because it already has such a relatively short cooldown, you won't really need this too much, especially for its point cost. However, it is occasionally useful for its RE generation and damage mitigation opportunities, especially with bosses with frequent fast attacks. The point cost and low chance to reset make this glyph debatable though.
(4) Glyph of Numbing - 10% chance to decrease opponent's attack speed by 15% for 7 seconds.
Lowered attack speed on certain bosses is nice, but not too necessary. Relatively high point cost as well for only a 10% chance to proc, and only on bosses that aren't immune to it in the first place. I find it throws my timing off more often than it is useful.

Deadly Gamble
(4) Glyph of Energy - Decreases cooldown by 25%.
Relatively long cooldown, but increased crit rate can never hurt. Even so, the glyph for this is generally not worth it.

Cascade of Stuns
(4) Glyph of Brilliance - Reduces MP cost by 88.
No.
(3) Glyph of Influence - Reduces MP cost for the next chain skill by 88: Rain of Blows.
No.
(4) Glyph of Powerlink - Increases skill damage for the next chain skill by 20%: Rain of Blows.
Cascade of Stuns has a relatively long cooldown, but because of the high base damage of Rain of Blows and the fact that you can generally fire off Cascade of Stuns anytime you want, definitely consider this glyph if you fire both off with any regularity. Pair it with the Glyph of Energy for maximum benefit.
(4) Glyph of Energy - Decreases cooldown by 25%.
On bosses immune to stun, Cascade of Stuns is mainly used as filler. If you use this skill regularly, consider turning this glyph on.
(4) Glyph of Power - Increases skill damage by 25%.
On bosses immune to stun, Cascade of Stuns is mainly used as filler. If you find yourself squeezing in this skill frequently, consider turning either this glyph on and/or the Glyph of Powerlink.
(3) Glyph of Lingering - Increases effect duration by 25%.
Situational, mostly due to the nature of Cascade of Stuns.

Backstab
(5) Glyph of Energy - Decreases cooldown by 25%.
Useful for chasing, but expensive, and if you tank well enough so that the boss never runs away from you in the first place, you won't need it!
(2) Glyph of Advantage - Generates 1 additional Edge.
As a tank, you usually won't use it often enough to find to Edge generation to be worthwhile.
(3 | 2) Glyph of (Laceration | Lingering) - Increases effect duration by 50%.
Backstab's stun duration is already pretty short, so you won't see much of an increase. Useful in only a handful of situations.

Staggering Counter
(3) Glyph of Power - Increases skill damage by 25%.
With bosses that are immune to stun that you'll be using Staggering Counter frequently against, this glyph isn't bad considering its point cost.
(5) Glyph of Lingering - Increases effect duration by 50%.
Situational, mostly due to the nature of Staggering Counter and this glyph's high point cost.
(4) Glyph of Persistence - Decreases cooldown by 20%.
Relatively high point cost, but it can be useful, especially if paired with the Glyph of Power.
(4) Glyph of Powerlink - Increases attack power for the next chain skill by 10%: Cascade of Stuns.
For its high point cost, this glyph isn't really worth it, especially since Cascade of Stuns has a relatively high cooldown. If you use it, pair it with Cascade of Stuns cooldown reduction.

Smoke Aggressor
(4) Glyph of Energy - Decreases cooldown by (20% | 25%).
Smoke Aggressor should only be used situationally. You'll rarely find it on cooldown when you need it.

Pounce
(2) Glyph of Energy - Decreases cooldown by 20%.
Because it's a great tanking skill and one of our starters, it's usually a good idea to have this glyphed.
(3 | 2) Glyph of the Swift - Increases attack speed by 30%.
Debatable. The extra attack speed helps you squeeze in combos between boss attacks, but if you use it as a damage mitigation skill, a longer cast time means more attacks can get a 50% damage reduction and you have an easier time timing your use of Pounce. Experiment with this both on an off and see which option fits your playstyle more.

Traverse Cut
(2) Glyph of Lingering - Increases effect duration by 50%.
If you have a hard time keeping the debuff stacked on bosses, you can divert a few points here from elsewhere. You should generally be using this skill as part of your rotation though, so keeping the debuff alive should not be an issue.
(2) Glyph of Brilliance - Reduces MP cost 75.
No.

Blade Draw
(4) Glyph of Power - Increases skill damage by 25% and improves the skill's edge generation.
Power is Threat. Blade Draw will be your primary skill in that regard because of how often you will use it. Keep this on.
(2) Glyph of Brilliance - Reduces MP cost by 80.
With how often you'll be firing off Blade Draw, this is the only MP glyph that will really have an impact on your MP usage. If you have any points left over, this is not a bad glyph to spend them on.
(5) Glyph of Persistence - 50% chance to eliminate cooldown.
Power is Threat. Blade Draw will be your primary skill in that regard because of this glyph in particular. The more you can use Blade Draw, the more damage you will deal and the more aggro you will generate.
(3) Glyph of Advantage - Generates 1 additional Edge per hit.
Since it doesn't cost much, and you'll be using Blade Draw often, this is great to keep on so that you and your warrior buddies can Scythe more often.

Scythe
(6) Glyph of Carving - Doubles the chance of a critical hit.
If you're the only warrior, glyphing this will help you out a great deal. Otherwise, you'll want to let your warrior damage dealers Scythe and give yourself more points to put elsewhere.
(5) Glyph of Sharpness - Increases bonus Edge damage by 25%.
If you're the only warrior, glyphing this will help you out a great deal. Otherwise, you'll want to let your warrior damage dealers Scythe and give yourself more points to put elsewhere.

Reaping Slash
(5) Glyph of Power - Increases skill damage by 25%.
No. Why are you in Assault Stance?

Cross Parry
(4) Glyph of the Pump
- 30% chance to increase power by 15% for 10 seconds on a successful block.
As a tank, it shouldn't come as surprising that you tend to block a lot. Power is threat. Having a 15% power boost almost all of the time you're tanking dramatically increases your aggro potential. While having more damage never hurts, because the boost comes from an increase to power rather than a direct skill damage increase like the other glyphs, if you aren't able to attack often, this glyph has diminishing returns. If you're able to however, the extra damage you'll dish out will be very beneficial.

Smoke Flanker
(6) Glyph of Threat - Provides 20% additional aggro.
Smoke Flanker already holds aggro like a boss. Don't worry about this glyph.
POWERLINK GLYPH COMPARISONS
When choosing glyphs, you may be wondering which combinations of glyphs will provide you with a higher damage output. What follows is a very informal damage-per-second comparison between some of the more viable powerlink glyphs you can choose from (informal because it only looks at base skill damage, ignores skill chains affecting casting speed, and does not take into account when during the casting animation the cooldown timer starts). You should remember that even if a glyph set provides more damage than another, it won't matter if you don't or aren't able to use those skills often (and in that order if it's a powerlink). Generally, powerlinks are capable of upping your damage considerably, while direct damage increases and cooldowns give you more flexibility while tanking and don't force you to associate the cooldowns of different skills with each other. Use whatever you feel will benefit you most.
The bolded values are the theoretical maximum base damage-per-second gained from that respective glyph combination. The line right above each calculation indicates which glyphs are active for that estimate.

Rain of Blows ~ 1736 base damage & 7 second cooldown
(5) Glyph of Power - Increases skill damage by 25%.
Cascade of Stuns ~ 20 second cooldown
Cascade of Stuns (4) Glyph of Powerlink - Increases skill damage for the next chain skill by 20%: Rain of Blows.
Cascade of Stuns (4) Glyph of Energy - Decreases cooldown by 25%.
theoretical maximum dependant on Cascade of Stuns: (20|15 ≥ 7)
CoS - GoPl
(1736)*(0.20) = 347.2 base damage gained on RoB
→ (347.2)/(20) = 17.36 extra base damage-per-second max
CoS - GoPl,GoE
(1736)*(0.20) = 347.2 base damage gained on RoB
→ (347.2)/(20*(1 - 0.25)) = 23.15 extra base damage-per-second max
CoS - GoPl | RoB - GoP
(1736)*(0.20 + 0.25) = 781.2 base damage gained on RoB
→ (781.2)/(20) = 39.06 extra base damage-per-second max
CoS - GoPl,GoE | RoB - GoP
(1736)*(0.20 + 0.25) = 781.2 base damage gained on RoB
→ (781.2)/(20*(1 - 0.25)) = 52.08 extra base damage-per-second max

Combative Strike ~ 933 base damage & 3 second cooldown
Charging Slash ~ 12 second cooldown
Charging Slash (4) Glyph of Powerlink - Increases skill damage for the next chain skill by (50%): Combative Strike.
Charging Slash (3) Glyph of Energy - Decreases cooldown by 25%.
theoretical maximum dependant on Charging Slash: (12|9 ≥ 3)
ChS - GoPl
(933)*(0.50) = 466.5 base damage gained on CS
→ (466.5)/(12) = 38.88 extra base damage-per-second max
ChS - GoPl,GoE
(933)*(0.50) = 466.5 base damage gained on CS
→ (466.5)/(12*(1 - 0.25)) = 51.83 extra base damage-per-second max

Rising Fury ~ 474+680 base damage & 4.5 second cooldown
Combative Strike ~ 3 second cooldown
Combative Strike (5) Glyph of Powerlink - Increases skill damage for the next chain skill by 20%: Rising Fury.
theoretical maximum dependant on Rising Fury: (4.5 ≥ 3)
CS - GoPl
(474 + 680)*(0.20) = (94.8 + 136) base damage gained on RF
→ (94.8 + 136)/(4.5) = (21.07 + 30.22) = 51.29 extra base damage-per-second max

Cascade of Stuns ~ 1314 base damage & 20 second cooldown
(4) Glyph of Energy - Decreases cooldown by 25%.
(4) Glyph of Power - Increases skill damage by 25%.
Staggering Counter ~ 15 second cooldown
Staggering Counter (4) Glyph of Powerlink - Increases attack power for the next chain skill by 10%: Cascade of Stuns.
Staggering Counter (4) Glyph of Persistence - Decreases cooldown by 20%. (no impact on theoretical maximum but included anyways)
theoretical maximum dependant on Cascade of Stuns: (20|15 ≥ 15|12)
SC - GoPl
(1314)*(0.10) = 131.4 base damage gained on CoS
→ (131.4)/(20) = 6.57 extra base damage-per-second max
SC - GoPl | CoS - GoE
(1314)*(0.10) = 131.4 base damage gained on CoS
→ (131.4)/(20*(1 - 0.25)) = 8.76 extra base damage-per-second max
SC - GoPl | CoS - GoP
(1314)*(0.10 + 0.25) = 459.9 base damage gained on CoS
→ (459.9)/(20) = 23.00 extra base damage-per-second max
SC - GoPl | CoS - GoE,GoP
(1314)*(0.10 + 0.25) = 459.9 base damage gained on CoS
→ (459.9)/(20*(1 - 0.25)) = 30.66 extra base damage-per-second max
Even though this is all theorycrafting in a flawed-yet-ideal situation, it's pretty clear that the Cascade of Stuns powerlink from Staggering Counter isn't worth it in PvE no matter how much you supplement it. Twenty seconds is just too long of a cooldown to work with. Additionally, because Rising Fury's Glyph of Persistence is based upon RNG, I left it out of this subsection, but do consider it if you're also looking at its powerlink from Combative Strike.
You should also keep in mind that these powerlink damage boosts affect SKILL DAMAGE, meaning that they take the number you see when you hit a target with your skill, and directly increase it by 10/20/50% depending on the glyph. I used base damage for my estimates here, so this means that when actually hitting real targets, skills with higher base damage like Rain of Blows willsee a greater powerlinked damage boost compared to skills with lower base damage.
Like I mentioned above, it's important to keep in mind that with powerlinks, you need to take the cooldowns of both of the relevant skills into consideration, especially if you use both those skills often. You also need to remember that you're tanking, so you'll be using other skills as well and blocking/dodging BAM attacks left and right.
Take for instance the Rain of Blows powerlink from Cascade of Stuns (with no cooldown glyph). You can cast CoS then an RoB chain right after, giving you about 18 seconds before CoS comes off cooldown again for you to use it in another powerlink. In the best of conditions, you've got the time to cast one more RoB somewhere in that time period. If you throw out that second one as soon as RoB comes off cooldown, the next time RoB comes off cooldown you'll have about 5 seconds left on CoS. To get the most out of that powerlink glyph, it makes sense to wait until you use CoS again before casting an RoB chain. But that's if you're focusing on just min-maxing that glyph. We want put as much damage on the boss as possible to not only help the group out, but also to help us keep threat. You'll do more damage in the long run if you cast RoB again with 5 seconds left on CoS cooldown, then wait a second or two once CoS is off cooldown to cast another CoS RoB arrangement. This is because you can't ignore the fact that RoB still does a respectable amount of damage on its own. If you also consider that this just the ideal situation, and that heaven forbid a BAM decide to go smoke a joint and pretend you're not there, you'll more than likely find that you only have time for one RoB after it comes on cooldown before CoS also comes off cooldown anyway.
Powerlinks are great to take advantage of if you've got them; just don't prioritize them over tanking the BAM.
↿ Back to top ↾General Tactics
You have a variety of options when it comes to negating boss damage, and Glyph of the Pump for Cross Parry is a good addition to your damage output when it procs. Keep this in mind when tanking. When a boss goes to attack you, you generally have four ways to negate the damage:
- block the attack with

- i-frame it with

- i-frame it with

- physically move out of the way of the attack, either by just walking or using a skill like
 or
or 
Each has its advantages. The first gives you a chance to proc/refresh Glyph of the Pump, the second and third open up the high-damage Vortex Slash→Blade Draw chain, the second and fourth allow you to continue dealing damage while the boss is attacking, and the third and fourth give you the chance to reposition yourself if necessary. Depending on if you have the attack speed glyphs for DFA and Evasive Roll, the second and third options may also give you the chance to proc this glyph. Generally, you should first check to see if you have the Glyph of the Pump proc'd, and once you see you do, choose from the rest depending on your glyph setup, what's on cooldown, how much RE you have, and what boss attacks you think will be coming up soon.
If you're low on RE and DFA is on cooldown, your only option will usually be to tank the hit to the face and endure it. In these cases, you'll want to start casting skills so that you can get as much RE back as possible. Keep in mind your skills that reduce damage. Your rough list of priority for damage mitigation should be Torrent of Blows, otherwise a Pounce chain, otherwise a Rain of Blows chain, otherwise a Rising Fury chain. Keep in mind that Torrent of Blows is your only skill that also reduces the chance you have of getting knocked down or stunned, making it even better for tanking through hits. Along the same lines, if you've proc'd Glyph of the Pump or Glyph of the Swift, and want to take full advantage of the boost you've received by throwing out as much damage as possible, tanking a few hits to do so isn't too bad of an idea. Always use common sense though, and try to pick and choose what to attack through and what skills to use. The true answer to how much of a risk you should expose yourself to lies with your healers though. If they're talented enough to can heal stuff like this no sweat, and/or all the damage dealers in the group actually know how to dodge shit (you wouldn't believe), the amount of extra damage and aggro you're pulling from the boss is definitely always worth the risk. Feel free to use your own consumables to help out in that regard, HP consumables and Warding Scrolls primarily come to mind.
As a tank, your skill rotation is not set in stone. The skills you use will depend on how much time the boss gives you in between its attacks, as well as what skills you have that are on cooldown. Here's a general list of questions in order of priority that you should keep in mind while tanking: (keep in mind that this will change depending on your glyph setup, see the following section)
- is
 off cooldown? if so, use it after the next attack or during the next attack for the damage mitigation
- is
 off cooldown? if so, what chains into it and is also off cooldown?
- is
 off cooldown? do I need to save the endurance debuff stacks? are either
  or
or  off cooldown? if so, chain either starter into
  →
→ , or go directly to a hit of scrubby
  →
→ if you're desperate
- is
 off cooldown? do I not need it for chasing a mobile boss? if so, chain it into
- is
 off cooldown? if so, chain it into
- is
 off cooldown? do I not need to save
  or the RE for an
  anytime soon? if so, use either one to dodge the next attack and chain into
  →
→
- is
- is
 off cooldown? are either
  or
or  off cooldown? if so, chain either starter into
- if your main damage skills are on cooldown then use filler skills until something becomes available (
 ,
,
 ,
,
 ,
,
 ,
,
 ,
etc.)
Along the same lines, there will be cases where you don't have enough time in between boss attacks to pull off a full skill chain. In these cases, you should try and squeeze in damage where possible in order to keep up both your damage output and your RE pool. Here's a list of options to consider: (there are many more, just use your own judgement)

good damage, fast execution, low cooldown, stacks edge, decent RE regeneration, applies endurance debuff, costs HP instead of MP; downside is that you lose your main skill chain starter for a bit; even so, three seconds is barely time at all (and you can cut that even shorter with nostrums), so this should generally be your go-to skill when you want to squeeze in some quick damage

decent damage, fast execution, okay cooldown; downside is that you will (should) only be using it on bosses that are immune to stun

good damage, fast execution for first two hits, decent cooldown, good RE regeneration on third hit, stacks edge on third hit, damage mitigation during execution, chains into Blade Draw; downside is that the third hit is where most of the magic happens, and it makes the animation noticeably longer and locks you into it

fast execution, decent cooldown, stacks edge, decent RE regeneration; downside is the trash damage

fastest execution (if you need to block cancel), regenerates a little MP and RE; downside is the trash damage
If you haven't noticed already, what I've posted is essentially the warrior DPS rotation, slightly modified to include tanking skills. You'll never have the time to pull these skill chains off completely and consistently, simply due to the fact that you're tanking a BAM that you need to block and dodge. During the gaps in between BAM attacks, you'll be attacking back, and if you've got a sizable chunk of time, you go through what's available in your normal rotation, otherwise if you don't have much time, you use filler skills. Excluding Scythe, Blade Draw and Rain of Blows are the bread 'n butter of your damage, and firing these skills off as much as possible should always be a priority when you're presented an opportunity to do so. Depending on what you have glyphed as well, you'll need to change the priority order of your skills accordingly.
It goes without saying that as a tank, you need to be constantly aware of what the BAM you're tanking is doing, especially when it has attacks that will move it around the battlefield. The less often it does so, and the less often it turns in different directions, the easier time it is for your damage dealers to stick behind the BAM and deal backcrits. Depending on where you position the BAM in the area you're in, you can potentially put the BAM in a position where attacks that normally move it around keep it stationary. This most commonly take the form of "wall-tanking", where you sandwich yourself between a hard-boundary and the BAM. Depending on whether or not the boundary affects your camera, you may need to move the camera to see what you and the BAM are doing (or you might not be able to see anything at all). If you need to adjust your camera, try zooming in or out, and it that isn't enough, experiment by physically moving the position of the camera with the Shift+Arrow Keys (by default, unless you've bound them to different keys).
If you're warrior tanking, chances are there won't be a lancer in your party (sans raids). Assuming that there are no warrior DPS in your party, you'll need to keep up both your Combative Strike and Traverse Cut debuffs for your party members in order to justify yourself as an adequate lancer replacement (not that we have many aggro issues anyway). The former is easy to keep up; the latter is slightly harder. Since the increase duration glyphs for both of these debuffs are generally a waste of valuable glyph points, you'll want to manage those debuffs to the best of your ability. Combative Strike won't be hard to maintain simply because you'll be using it so much. Traverse Cut is another story. For fast bosses like Mark III Cyclops, you'll also never have time to put out both a combo starter and all 13 hits in one go. It's generally a better idea in these cases to just slowly build up the stacks as you go. Remember that to save the debuff stacks, you'll only need to hit with one of Traverse Cut's stabs, so consider just landing a handful of hits before canceling into Blade Draw. If both your starters are on cooldown, consider even just poking them with one hit of the 3-hit scrubby version and canceling into Blade Draw from there.
↿ Back to top ↾Glyphing for Playstyles
As previously mentioned, the way you glyph will depend on how you play. There is no "definitive" glyph build for warrior tanking. You glyph for what works for you, and you'll often find that you fall under more than one of the playstyles I discuss in this section. You're the one that knows how you play best, so use your own judgement and reason out what skills you use and how you use them when choosing between glyphs. Don't adhere to any of these builds. The purpose of this section is to give you ideas if you're stuck on the fence about what glyphs will provide more benefits for your own tanking preferences.It is also intended to list other possible ways of tanking and bring them to the attention of anyone looking for a "better" way so that they can try it out and see if it actually is for them. From what I've seen though, none are.
This section will assume you already have all your master glyphs. Though like I mentioned above, as warrior tanks we're lucky not to require too many.
Core Glyphs (24 points) (dead link)
Even with all our options though, there are generally a few glyphs that are considered to carry great benefits to all warrior tanks regardless of playstyle(s). I'll refer to these as the Core Glyphs. Together, these six glyphs take up 20 of your 50 total glyph points:


Rain of Blows
(5) Glyph of Power - Increases skill damage by 25%.
Charging Slash
(3) Glyph of Energy - Decreases cooldown by 25%.
Blade Draw
(4) Glyph of Power - Increases skill damage by 25% and improves the skill's edge generation.
(5) Glyph of Persistence - 50% chance to eliminate cooldown.
(3) Glyph of Advantage - Generates 1 additional Edge per hit.
What you do with the remaining 30 glyph points is up to you, and depending on both how you play and the dungeon you'll be tanking, your setup will most likely change to fit the situation. I've listed some examples of glyph combinations you can add to the Core Glyphs to give you an idea of what can be done. Again, keep in mind these are EXAMPLES, and that you should use the glyphs that YOU know will benefit you most.
These names are by no means official.
SPEEDY RNGESUS
You love attack speed, and the more of it you have, the better. This playstyle centers around DFA's Glyph of the Swift, and you can use it to bump yourself up to Tazmanian Devil status with your skill execution speeds. The MP drain is somewhat larger in comparison to other playstyles, but you'll find yourself landing more hits and receiving more opportunities to squeeze in damage wherever you can. It becomes easier to pull off longer chains in shorter time frames (which also ups RE regen, boss aggro, and damage dealt), but it goes without saying though that the effectiveness of this setup depends on how many times the attack speed buff chooses to proc.
The following glyphs are ones you might pick and choose from to accomodate a "Speedy RNGesus" playstyle:


Evasive Roll
(4) Glyph of the Swift - 30% chance to increase attack speed by 15% for 10 seconds.
(3) Glyph of Unending - Reduces RE cost by 100.
Death From Above
(3) Glyph of the Swift - 50% chance to increase attack speed by 15% for 10 seconds.
(2) Glyph of Energy - Decreases cooldown by 30%.
Vortex Slash
(5) Glyph of Power - Increases skill damage by 25%.
(4) Glyph of Persistence - 30% chance to eliminate cooldown.
Cross Parry
(4) Glyph of the Pump - 30% chance to increase power by 15% for 10 seconds on a successful block.
DFA should be moved up much higher on your priority queue so that you give yourself as many opportunities as possible to proc the 15% attack speed increase. Since you have a 50/50 shot with every DFA, there's a fairly good chance you'll have the attack speed buff up at any given time. If DFA doesn't proc the speed buff, Evasive Roll can also be used appropriately and as necessary. Cross Parry is glyphed due to the amount of extra damage you'll be able to squeeze in with your amped attack speed. You can also glyph Vortex Slash damage and/or reset chance to take full advantage of the fact that you'll be using DFA & Evasive Roll often enough where you'll more than likely be able to cast it at any point in time (and to give you another constant Blade Draw chain option). You'll need to be careful of RE management though if you use Evasive Roll as well, get too roll-happy, and waste all your RE trying to proc the speed buff, as well as the lost damage you could have been inflicting while doing so.
VANGUARD / THE WALL
Tanks who prefer to avoid using dodges because they're used to blocking (such as previous Lancers) or don't want to rely on RNG for better threat can pour their glyph points into skills that will directly up their damage output and give them more skill options at any point in time.
The following glyphs are ones you might pick and choose from to accomodate a "Vanguard" playstyle:


Charging Slash
(4) Glyph of Powerlink - Increases skill damage for the next chain skill by 50%: Combative Strike.
Cascade of Stuns
(4) Glyph of Energy - Decreases cooldown by 25%.
(4) Glyph of Power - Increases skill damage by 25%.
Staggering Counter
(3) Glyph of Power - Increases skill damage by 25%.
(4) Glyph of Persistence - Decreases cooldown by 20%.
Pounce
(2) Glyph of Energy - Decreases cooldown by 20%.
Pounce cooldown allows for your second main starter to be available more often to use for chains as well as damage mitigation. The same goes for Staggering Counter (on bosses immune to stun) and Cascade of Stuns when used as filler. The chosen glyphs also bump up the power of these skills when you do use them, and the Charging Slash powerlink will usually never go to waste due to how often you'll be using Combative Strike.
HEADSTRONG
While tanking, it's not a bad idea to purposefully take a few hits so that you can deal more damage and hold better aggro. Either that or you want to take full advantage of Glyph of the Pump when it procs and pour out as much damage as you can until the buff runs out. This is also an excellent opportunity to take advantage of hard-hitting skill chains and powerlinks, especially with skills that reduce damage. Pounce→Rain of Blows can be used for damage mitigation during boss attacks as mentioned way way back. Keep in mind that this type of playstyle will be more effective the better your armor is, and also asks a bit more of your healer. Additionally, you need to keep in mind which boss attacks are more liable to knock you down (some boss attacks have a higher chance to knockdown than other attacks, while others are flat-out guaranteed knockdowns) so that you will block or dodge appropriately, rather than wasting time and a Retaliate.
The following glyphs are ones you might pick and choose from to accomodate a "Headstrong" playstyle:


Defensive Stance
(5) Glyph of Grounding - Increases endurance by 20%.
Death From Above
(3) Glyph of the Swift - 50% chance to increase attack speed by 15% for 10 seconds.
(2) Glyph of Energy - Decreases cooldown by 30%.
(5) Glyph of Grounding - Increases endurance by 25 for 8 seconds
Combative Strike
(5) Glyph of Powerlink - Increases skill damage for the next chain skill by 20%: Rising Fury.
Pounce
(2) Glyph of Energy - Decreases cooldown by 20%.
Cross Parry
(4) Glyph of the Pump - 30% chance to increase power by 15% for 10 seconds on a successful block.
Pounce energy is glyphed for its damage mitigation potential, as well as Death From Above for its attack speed proc and damage while dodging. Defensive Stance's endurance buff helps you tank hits better and keep you on your feet, as does DFA's 8-second boost, which will be active nearly all the time due to how often you'll probably use it. Glyphing the Rising Fury powerlink from Combative Strike is also an option, due to how often you'll be using both these skills and Rising Fury's damage mitigation potential.
TURTLEBRO

If you're tanking a fast or hard-hitting boss or find that you don't have much time in between boss attacks to pull off your own combos, you'll need to poke the boss whenever you can, as fast as you can, and as hard as you can before ducking back behind Cross Parry. Either that or you're learning how to tank a new boss and want to play it safe. RE management might be an issue if you need to block for long periods of time, so make sure to cast skills as much as possible to get some back.
The following glyphs are ones you might pick and choose from to accomodate a "Turtlebro" playstyle:


Torrent of Blows
(6) Glyph of Threat - Provides 20% additional aggro.
Death From Above
(2) Glyph of Energy - Decreases cooldown by 30%.
Charging Slash
(4) Glyph of Powerlink - Increases skill damage for the next chain skill by 50%: Combative Strike.
Vortex Slash
(5) Glyph of Power - Increases skill damage by 25%.
Pounce
(2) Glyph of the Swift - Increases attack speed by 30%.
Charging Slash and Combative Strike are fast skills that allow you to turtlepoke; Pounce too now that you've glyphed it. Because you'll likely be using DFA as much as you can to dodge and get back some RE, Vortex Slash becomes another skill you can use before quickly hiding behind your block again (remember that you don't have to cast it immediately after, you have a four second window to do so). By adding damage to the skills you'll use often and increasing the threat generated by Torrent of Blows, you hopefully compensate a little bit for the lost damage dealing time you're spending blocking.
GIANT DAD / THE AGBRO
There will be times where you want maximum threat, or are having trouble keeping aggro through damage. These glyphs prioritize aggro generation above all else, and buff up the threat generation of your two main aggro skills. Threat through damage is left more solely to your skills as a damage dealer.
The following glyphs are ones you might pick and choose from to accomodate a "Giant Dad" playstyle:


Torrent of Blows
(6) Glyph of Threat - Provides 20% additional aggro.
Battle Cry
(4) Glyph of Energy - Decreases cooldown by 20%.
(6) Glyph of Haste - Increases casting speed by 50%.
(3) Glyph of Threat - Provides 100% additional aggro.
Torrent of Blows is self explanatory. While Battle Cry doesn't pull a huge amount of threat to start with, a 100% aggro increase is still substantial enough to make it worth it. Battle Cry cooldown and casting speed are useful for giving you more opportunities to fit it in, but if you glyph Battle Cry accordingly, you should be using it pretty much off cooldown to justify the point cost. THE LEGEND NEVER DIES.
LONE WOLF

When you're the only warrior in the dungeon, you're free to take advantage of Edge to add mountains more to your damage output. Since you're now free to use Scythe, your skill priority should be changed accordingly. Because you're tanking though, maintaining Edge stacks can sometimes be an issue if a boss decides to pick up the slack and spare you no breaks.
The following glyphs are ones you might pick and choose from to accomodate a "Lone Wolf" playstyle:


Death From Above
(3) Glyph of the Swift - 50% chance to increase attack speed by 15% for 10 seconds.
(2) Glyph of Energy - Decreases cooldown by 30%.
Charging Slash
(4) Glyph of Powerlink - Increases skill damage for the next chain skill by 50%: Combative Strike.
Scythe
(6) Glyph of Carving - Doubles the chance of a critical hit.
(5) Glyph of Sharpness - Increases bonus Edge damage by 25%.
Take advantage of the fact that DFA generates Edge while using Charging Slash, Combative Strike, and other Edge skills to Scythe more often and boost your damage output. Since you use DFA more often as a tank than you would as a DPS, you can also potentially utilize the attack speed buff when it procs to stack Edge faster and occasionally save stacks in tricky situations.
I'll mention one last time that all these glyph combos are just examples, and are not meant to be adhered to. If you find yourself using one particular set of skills more than another, glyph according to those skills and how you would use them. Most warrior tanks like myself find that they fall into more than one category (Headstrong & Speedy RNGesus in my case), so never limit yourself to one playstyle! Ask yourself how you play, and glyph accordingly.
↿ Back to top ↾Equipment
This section will be short, mainly because the gear you have doesn't have as much of an influence on how well you do as a tank as your actual skills do. It doesn't matter how well you decorate a cake if it tastes like shit; and if you've oversweetened the frosting so badly that you can't even taste the cake anymore, that's something we call "getting gear carried", and something you want to avoid.
While your weapon is clearly the most important part of your arsenal as a tank, you can't ignore your armor and jewelry. The more endurance and defense you have, the more damage you can take. And the more balance you have, the less likely you are to get knocked down if you have to use a skill through a boss attack.
↿ Back to top ↾GEAR LINES
Attack speed is an important weapon stat line to keep in mind as a warrior tank. The main advantage to having more attack speed as a warrior tank is that your skills execute faster. This won't be noticeable at low levels or early level 60 dungeons mainly because boss attacks will be slow and infrequent enough to not pose a threat to your RE. At endgame, having the extra attack speed lets you squeeze in more skills and more skill hits, which will be useful not really for the extra damage (it only helps slightly) but for the extra RE you can regenerate from skill hits in the same period of time.
The main downside to having attack speed as a warrior tank is that you potentially lose a damage/threat roll, meaning that you won't pull as much threat from the boss with your attacks (the extra attack speed will usually not be enough to make up for this unless the boss decides it's not going to attack you at all). The other downside is that your Death From Above will execute faster and give you fewer invulnerability frames. =[
Early on as a fresh 60 doing fresh 60 instances, you won't notice much of a difference. On the other hand, for bosses in dungeons like Crucible of Flame, attack speed becomes practically mandatory, especially if you're doing Mark II or III bosses. You have much shorter window in-between boss attacks to use skills and gain RE back before you have to keep blocking. Faster attack speed allows you to pull off that last hit of Rising Fury or squeeze in more Rain of Blows hits and gain that needed RE back before you continue blocking.
In other words, if you're just starting out and are tanking near level-cap dungeons like AC, BT, and the like, it's fairly acceptable if you don't have any attack speed. Once you get ahold of your endgame weapon however, and you're prepping for endgame dungeons like high mark CoF, you'll screw yourself over without a little bit of attack speed on your weapon. Roll for however much attack speed you feel is useful to you, but it doesn't hurt to have as much as possible. Keep in mind that in the harder instances, boss attacks also speed up with the difficulty leap, so even though the Death From Above safe interval gets shortened with attack speed modifiers, boss attacks are also sped up such that it won't make a difference anyway. Also remember that the vulnerable idle frames right after the Death From Above are also shortened with the speed boost.
In short, you want to roll for as much attack speed as is necessary for you to tank comfortably. Once you have done so, devote the rest of your rollable lines and crystals to aggro and damage. If you have an opportunity to add even more attack speed on a remaining line that doesn't have much else going for it, all the better.
In terms of aggro, aggro lines will pretty much always generate more threat than the additional aggro from damage lines. However, additional damage has the benefit of speeding up kill times, whether it comes in the form of flat percentages or RNG-based criticals. Once you've rolled for the amount of attack speed you prefer, your remaining stats should be geared towards maximizing your damage and aggro. Excluding attack speed, lines to shoot for include more damage when attacking, extra damage dealt to target with highest aggro, critical damage, and critical rate, in an order based on your own preferences (the one listed is my own). Masterwork and enchant the weapon if possible, of course. If you're shooting for a WH weapon, you'll be getting either an intense, quick, or keen weapon, and these three types of weapon only differ on two fixed base lines. The intense weapon has flat damage & behind damage, the quick has flat damage & attack speed, and the keen has critical rate & critical damage. If you're going exclusively for a tanking WH weapon, throw the intense weapon out of the picture since behind damage is generally useless to you as a tank.
For your armor, the only pieces that really have a big impact on your tanking ability are your gloves and chest. Make sure your gloves have aggro lines on them (there are two types of each leather glove since the WH update, one for DPS and one for Tanks). On your gloves, you'll want to shoot for a combination of aggro, attack speed, and either crit rate or endurance (note that you cannot roll power on the tanking gloves) on all rerollable lines. Masterwork your gloves if you can, as this will not only boost existing stat lines, but it will also give you 3%, 4.5%, and 6% aggro bonuses when enchanted to 10, 11, and 12 respectively (a sizable increase!).
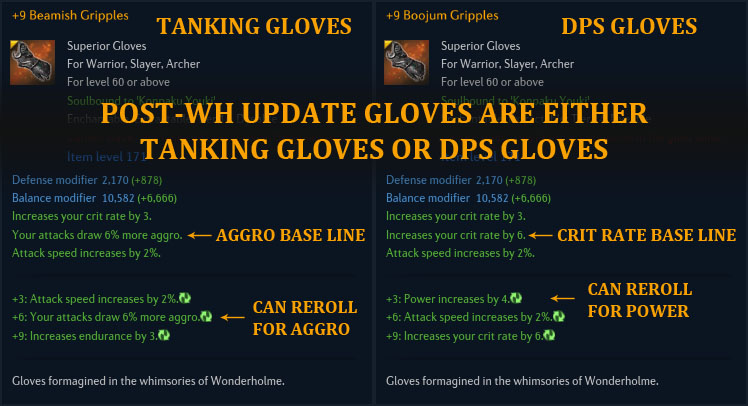
As for your chest, look for a leather chest with a warrior skill roll, and grab the roll that adds Blade Draw damage (other potential choices are DFA cooldown and Rain of Blows damage, but neither of these are as effective in general for PvE). Roll the other lines for stuff that will help you tank, including damage reduction, raise maximum HP, and damage reduction from target with highest aggro. On your boots, movement speed, endurance, and balance are generally good lines to shoot for.
As everyone knows, balance is a pretty broken stat in Tera, but as a tank it comes in handy. While there are boss attacks that are guaranteed knockdowns or have a high chance of knocking down, for all the other attacks that do not inflict status effects, the more balance you have, the less likely you will get knocked down when hit by one. This mostly matters to us if we decide to use a skill during a boss attack. There are obviously bosses such as Jack and Kezzel where this is simply impossible to do without something like Kaia's Shield, but elsewhere, it's an opportunity to sacrifice some HP for more damage and aggro. While some of our skills may mitigate damage, our balance isn't affected by anything other than buffs and our Defensive Stance (excluding Torrent of Blows, which boosts knockdown resistance while casting). If you have any extra stat lines which can be rolled for endurance or balance, it definitely does not hurt to do so.
↿ Back to top ↾CRYSTALS
For weapon crystals, four Threatening Cruxes (increases aggro) are standard fare. You can start swapping them out for Mutinous (increases damage against boss monsters) and/or perhaps a Focused (increases critical damage against enraged monsters) for endgame damage races, if your damage dealer crits aren't top notch, or if your aggro isn't a problem and you want to help out a bit with damage. Carry around some Hunter's Cruxes (increases damage against normal monsters) as well for dungeon trash.
If you're purely looking to maximize the amount of aggro you generate with just these four crystals, you'll be using 3 Threatening Cruxes for the first three slots. The last slot would be either a Threatening Crux or a Focused Crux, and this choice would be dependant on how much skill damage you're dealing to your target, and your critical chance and damage. If the BAM you're facing has high endurance and you aren't dealing too much damage compared to other dungeons, full Threatening Cruxes will benefit you the most threatwise. If you're hitting the BAM you're tanking pretty hard and your critical chance isn't too shoddy, a Focused Crux would benefit you more. Chynonm from the forums also recommends 2 Threatening Cruxes, 1 Mutinous Crux, & 1 Focused Crux as the combination that will give you the most aggro, so try this out too. We've got a great discussion going on in the thread for this guide (dead link), so if you're interested in this kinda stuff or want to contribute your own thoughts, stop by and take a gander at the walls of text and theorycrafting going on there.
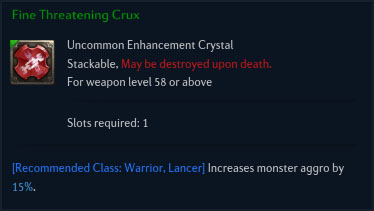
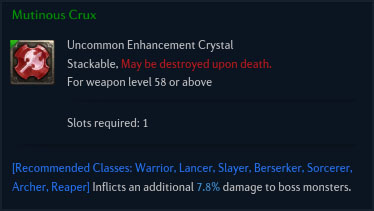
Armor crystals regardless of class should pretty much always be full Anarchic Cruxes (reduce boss monster damage). For dungeons like MC, have a set of full Relentless Cruxes (increases maximum HP) on hand, and you can carry around a set of Stalwart (reduce normal monster damage) or Vigorous (regenerates HP over time) Cruxes for killing dungeon trash in-between bosses. Ever since the WH patch however, many wearable equipment pieces can now be rolled for maximum HP increases; this means that you'll often have more than enough HP to do what you need to. Too high of an HP pool makes it harder on your healers, especially if a dungeon has damage-over-time mechanics (such as KN, MC, or WH), since damage-over-time is calculated based on maximum HP. In short, use Anarchic & Stalwart wherever you can, but carry the Relentless Cruxes around just in case.
Jewelry zyrks are mostly up to personal preference. You'll always want the Pristine versions though. Threatening Zyrks increase aggro generated, Swift Zyrks increase attack speed, and Powerful Zyrks increase power. Use what you wish.
CONSUMABLES
When doing serious runs, consumable use is practically a requirement if you want to up your contribution to your group, and as a tank that's no exception. The bare minimum includes campfire charms, onslaught scrolls, nostrums, noctenium infusions, and MP consumables. Whatever consumables you have though, make sure they are easily accessible and ready to use (use an alternate or extended skill bar for instance), don't open up your Inventory everytime you need to use something.
The campfire charms you should have on your person include Greater Infused Charms, Greater Enduring Charms, and Greater Power Charms or Greater Keen Charms depending on your preferences. No other charms are nearly as useful. Buy charms from the Specialty Store (found only minor cities). Also carry around campfires and firewood in case you don't have one to charm at.
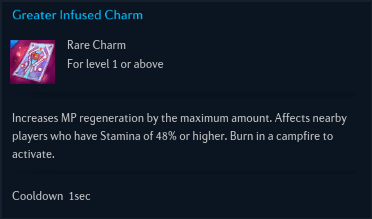

There are three different types of onslaught scrolls to choose from, and you can only have one activated at a time: Onslaught Scrolls of Savagery, Onslaught Scrolls of Carving, and Onslaught Scrolls of Swiftness. These you can either craft yourself or buy from other players/off the Trade Broker. Choose what you'll use based on your own preferences and needs.
Nostrums of Energy decrease your skill cooldowns and therefore up your damage output and tanking ability dramatically. You can use pretty much all of your skills more often, especially Torrent of Blows and Cross Parry (the only exception is Backstab, but you can use Ranger's Nostrums to cover that as well if you really care). Buy nostrums from General Merchants.
Noctenium Infusions are gotten from involvement in alliance and/or bought off the Trade Broker. When active, every activation of a skill that consumes noctenium will use an infusion and apply its respective effect to the skill you cast. When noctenium affects a skill, the numbers that show up from hits you land will be yellow instead of white, and your hand will emit a green light as it moves around. Do note that for warriors, noctenium only ups the amount of damage that affected skills deal (except Poison Blade where it extends its duration), in contrast to lancers, whose Challenging Shout also receives an aggro generation bonus from noctenium use.
MP consumables are the last of the bare essentials. Once you're used to tanking, you will actively be MP starved from consistent skill use, especially with Nostrums of Energy active. The passive MP regeneration provided by your Greater Infused Charms, a mystic's Aura of the Tenacious, and a priest's Mana Charge will not be enough to sustain your skill casts. Mana Potions and Mana Elixirs share a cooldown of 1 minute, while Mana Restoratives and Mana Draughts share a cooldown of 3 minutes. You can craft all four types of these MP consumables yourself, or buy them from others and/or off the Trade Broker. It's important to note that while elixirs and restoratives give you more total MP back than their potion and draught counterparts do, the former act over time, while the latter act instantly. Generally for MP though, this isn't an issue, and the regen rate from elixirs and restoratives is more than enough to sustain you, especially if you pop them ahead of time. If you have the resources, I also recommend investing in Divine Infusions, which provide a high MP regeneration rate while having only a separate, 30 second cooldown; buy these from other players and/or off the Trade Broker.


There are also other consumables you should consider carrying, due to their usefulness and the assistance they can provide groups:
HP consumables are the obvious one. If you're hanging by a thread and the healer can't get to you, pop some off to save your sorry ass. Bad things generally happen if the tank in a group dies, so don't let that happen to your run. Like the MP consumables, HP elixirs and restoratives work over time and heal more total HP than their instant potion and draught versions do, so use your judgement as to which ones you use. Craft them all yourself or buy them from other players/off the Trade Broker. If you seek additional HP consumables that do not share a cooldown with these two consumable types, Rejuvenation/Valiant Potions and Valkyon Health Potions are options that can be taken into consideration.

Scrolls of Rapid Resurrection are a must have for all players; don't use the crappy normal ones that drop from mobs, buy these Rapid versions from Specialty Stores (found only minor cities). Even though you often will have the least time out of anyone in your group to go resurrect someone, if the run is going badly, healers are dead, and/or your damage dealers are clueless, use one of your shadows to temporarily take the aggro off of you so that you can go pop your resurrect scroll and potentially save the run. If you do happen to die though and the run is extremely valuable to you, it's not a bad idea to carry a Goddess' Blessing on your person so that you can instantly resurrect if need be. Buy these from other players or off the Trade Broker.
Stamina drainage is generally a problem for all classes, and since it affects your maximum HP and MP, the effectiveness of your charms, and other factors, it's advisable to have it as high and possible as much as possible. Panaceaic Bolsters are extremely useful in this regard. Craft them yourself or buy them from other players/off the Trade Broker. Combat Panaceas can be bought from Specialty Stores (found only minor cities) are can be used in combat to restore a portion of your stamina, while Arunic Panaceas and Battle Panaceas fully restore your stamina (though arunics can only be used out of combat) and are best acquired from other players or off the Trade Broker.


Warding Scrolls occasionally come in handy due to the knockdown immunity they grant. They don't absorb a lot of HP, but they're useful in a pinch, especially if you want to improve your chances of successfully tanking through some BAM attacks. Craft them yourself or buy them from other players/off the Trade Broker.
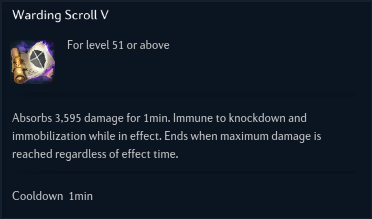
Luria Medicated Bandages are available at Specialty Stores (found only minor cities; don't buy the normal versions from General Merchants) and can't be activated in combat, but their effects persist into combat, so they occasionally come in handy; if anything, you can activate them right before you engage a BAM. Heart Potions increase the amount of healing you receive. This affects both incoming heals and your own HP consumable use. Craft them yourself or buy them from other players/off the Trade Broker. Canephora Potions are valuable consumables that up your skill damage for an hour. This stuff is liquid gold though, and is not acquired easily; you'd best grab an extra character slot and farm them from Federation boxes if you want your own steady supply.
Finally, Crystalbinds and Complete Crystalbinds circumvent crystal breakage. Use them at your own discretion, especially if you're learning a dungeon or BAM fight.

During certain TERA in-game events, unique consumables may also become avaiable for you to acquire for a limited time. These have various effects, but are generally more helpful than harmful. Here are a few of them.
There are also a few HP and MP consumables that can be acquired from just doing faction dailies. I don't have any to show you because I never do dailies anymore, but you should know that they exist and are an option, especially for those who don't want to spend too much money.
↿ Back to top ↾Thanks for Reading
I hope this guide has been helpful. While this is my third guide on TERAToday (SJG and MC), this is my first class-oriented guide. I update as often as VGCats, but feedback is always appreciated and can be left either in the comments down below or in the respective discussion post in the forums (dead link) (I check the latter more often).
Full album of CASUL images available here.
 ↿ Back to top ↾
Change Log
2014-05-22 ~ guide posted
2014-05-23 ~ added half the pictures
2014-05-24 ~ added the rest of the pictures, including the good ones (Wt ring u got bithc?)
2014-06-09 ~ feedback loop number one (see comments from 2014-06-06 to 2014-06-08); revamped the Glyph Build section and renamed it to Glyphing for Playstyles and scattered some additional information throughout the guide; added the "RE Discussion" section
2014-06-10 ~ added the "Consumables" & "Powerlink Glyph Comparison" subsections and expanded the Table of Contents; scattered some more information throughout the guide
2014-06-13 ~ added a little bit to multi-hit skills in the "Skill Discussion" section talking about how the damage they deal is calculated from the base damage value
2014-06-21 ~ made a few additions everywhere, demoted Cross Parry's Glyph of the Pump from its core glyph status because while its damage boost is nice, compared to other damage glyphs that cost 4 points, it only does more if you're constantly attacking and can get a lot of hits in (aka. Speedy RNGesus & Headstrong playstyles)
2018-04-17 ~ reuploaded to personal website, fixed some stray typos and slightly reformatted document